 Posted on
by
Posted on
by  3 Comments
 How to shoot meat; it is possible one of the most asked questions I get on food photography. In this post I explain what things to look out for and how to make the most beautiful photos of meat. Raw or cooked!
How to shoot your steak?
Taking pictures of meat. It seems to be a hurdle for a lot of people. Because how do you keep the meat from looking brown and boring? How do you make it look like you want to sink your teeth in straight away? What to look for in terms of light or even in terms of the meat itself?
Quality of meat
Let’s be clear on a few things upfront: shooting a ‘naked’ chicken filet is rarely an attractive image. It falls in the category of ‘it is, what it is’. Of course you make the light look nice and appealing but a naked piece of chicken is never going to look like a juicy steak. So that’s a given. Secondly you have to be realistic about the kind of meat you want to shoot. If you’ve bought a measly piece of pork at the supermarket it will be a real challenge to make it look appealing on camera. And if you end up not baking it properly, you’ll be left with a grey-ish kind of disgusting looking piece of pork. Not good. Is not going to be good either. So be realistic. If you want to shoot meat, make sure you have good meat. A nice steak, a pretty (whole!) chicken or another kind of meat. It doesn’t really matter all that much.

Discoloring
Raw meat has the tendency to discolor really quickly when there is a lack of oxygen. Place two pieces of raw meat on top of eachother and when you take them apart you will see a clear diference in color where they touched each other. It will get better if you leave it to breath a bit but it is something to take into account when you want to shoot raw meat. Take it out of the package and let it breath and if you have more than one piece make sure they are resting separately from each other. Also make sure the best part of the meat is on top as otherwise the other side will still not color nicely.

Trimming
Take a really good look at the meat in front of you. Are there any bits and pieces that look ugly and you would normally also remove? Cut it away with a sharp knife. The photo above was taken for a supplier of meat and so hasn’t been totally cleaned because that is not how the meat arrives at the buyer. If you’ve bought this piece of meat for yourself you can choose to remove it or not. But a little bit of fat also give it a nice texture (and let’s not forget flavor) so don’t cut it all away. Do remove weird bits and pieces that are on the meat and don’t look appetizing. It doesn’t need to look polished but any weird things can be removed.
Light
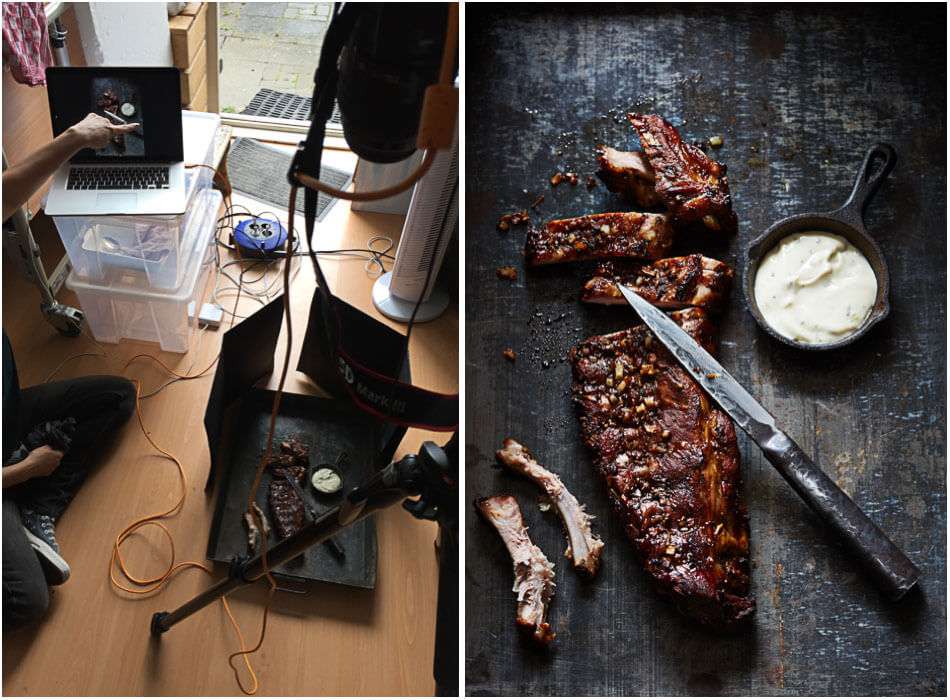
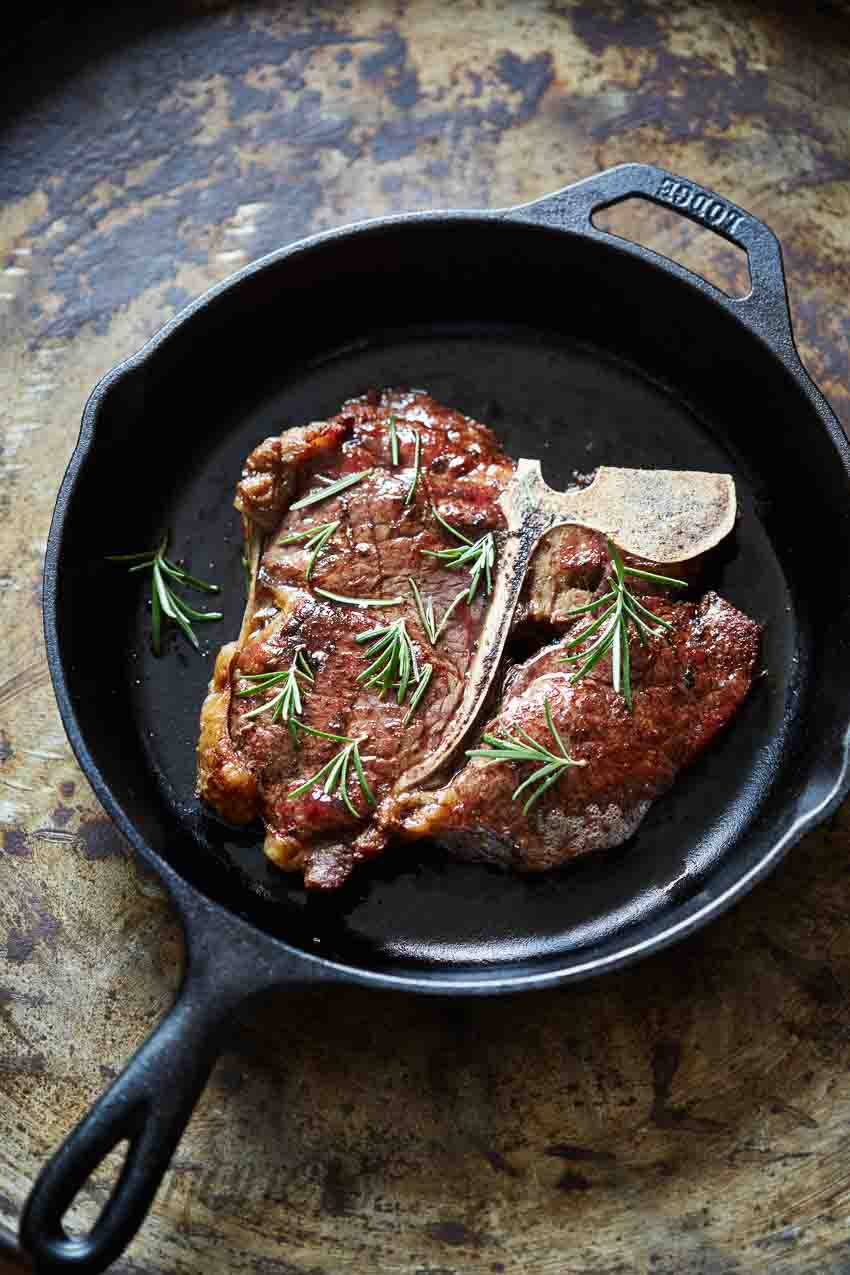
Whenever I have to shoot meat, I tend to always start with backlighting. Preferably daylight and if possible from top. If you go too low, the meat will be too shiny. A little bit of shine is essential though for meat-photos. Without it the meat will look lifeless and unappealing but you don’t want so much shine that you can’t see the texture of the meat anymore. The below photo is taken for a cookbook (the meatbible) and is shot from the side with backlighting and as you can see there is a quite some light shining over the meat but you can still see the texture. Just as with the photo of the spareribs I reduces the light coming from behind a bit to balance out the amount of light.

And as you can see, a beautiful piece of meat doesn’t need all that might with good light. The few saltflakes give it just a bit more interest. Raw meat cán be really beautiful unless you have that pesky chicken filet you want to shoot… 🙂
I have the tendency to shoot meat on really dark backgrounds. It goes well with the tough look of the meat. But in the end it is also a personal preference.

Prepared meat
Sometimes it happens that your meat doesn’t brown properly in the pan. And the result, a grey looking piece of protein is simply not nice to look at. So make sure you know how to prepare your meat properly. In general butter browns nicely. I also use coconut oil a lot as that can withstand higher temperatures and also makes sure you have a brown outside. And ofcourse make sure you don’t throw the meat in the pan when it’s not fully heated yet. But that has more to do with your cooking skills than with the photography itself.
Tricks
Baked meat such as a hamburger is quick to dry out. If you’re fiddling about for ten minutes before actually shooting the thing, it will not look it’s best anymore. So that means you either have to move quickly or pimp the burger with just a bit of oil and a brush or kitchenpaper. Don’t overdo it. You want it to look fresh not greasy.
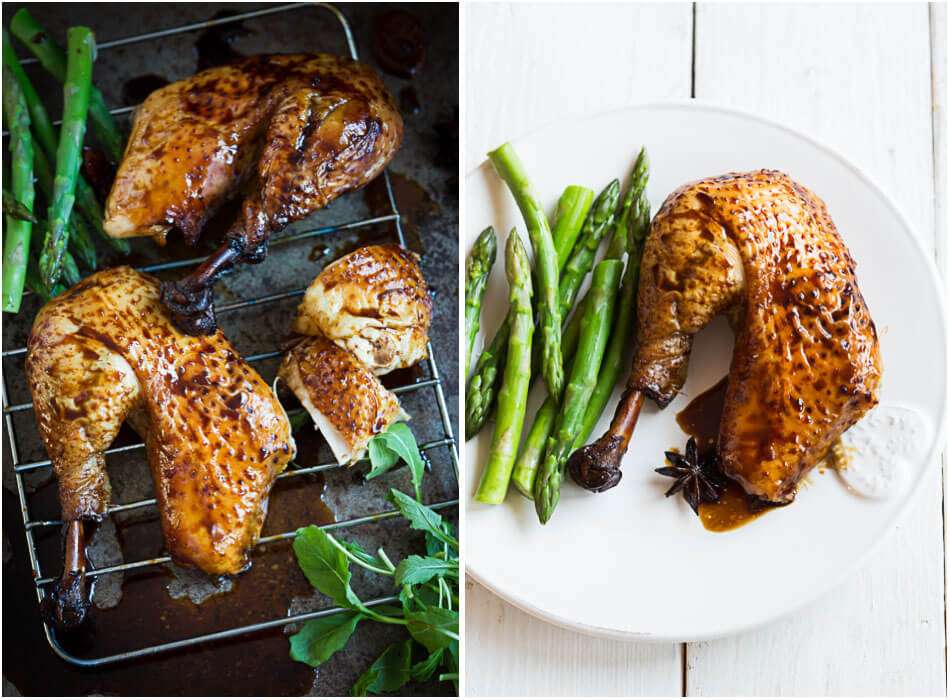
With the chicken above the skin didn’t turn out as crispy as I had hoped. Thankfully we had enough sauce in the pan and we did brush it over the chicken afterwards. I rarely use something that will make the meat inedible. That is a waste first of all and secondly rarely necessary. What you can also see very clearly in the above example is the difference between the first (rejected) take and the second on the white plate. By keeping it really clean and just use the chicken leg and the asparagus on the plate it looks very fresh.
Recap:
- Make sure you have a good piece of meat, without too many discolorations
- Let it breath before shooting it
- Cut away weird pieces
- When shooting use backlighting or side lighting but always make sure you have a little bit of shine over the meat. Meat with no shine looks boring.
- Dark and moody goes well with the subject
- Keep a little oil handy and a brush too to pimp the meat just before the final shot
- Make sure you brown the meat well as you do not want an unappealing grey flap.
Good Luck!
Also check:


Actually, if one looks at many different advertising photos, most of them use some type of backlighting…
That is very true. Backlighting is used a lot!
Thanks for sharing this! Ii’m starting a blog of my own and while I can cook circles around the average bear my photography skills are definitely sub par. You’ve really helped me think outside the box and I’m excited to have another go at the pork belly that bested me last week.