Working with studio strobes – not as scary as you’d think
During the workshops in food photography I give and also through email a lot of people ask me how to work with artificial lights. Now I love daylight and it would probably always be my preferred lightsource but in a lot of situations there is either no daylight at all or it is so dark that any shot would take 30 seconds to expose. Not exactly ideal if you’re on a timeschedule or have herbs wilting in front of your eyes. I have shown you a while ago how I work with a continuous artificial light that was fixed with daylight lamps.
Since I hardly ever use those myself I thought I would show you how I tend to work with artificial lights. For now we will start with one light only. If you are on a budget (and who isn’t these days?) you can find fairly cheap studio flashes or studio strobes (same thing, different word) online. Second hand is an option too but you should be able to get a basic thing for about 100 dollar. Ofcourse it won’t be as good as the more expensive ones but it will definitely get the job done.

In terms of pricing the difference between the cheaper brands and the more expensive ones is usually their durability, the consistency of the lights in terms of white balance, power and the adjustment options on the light itself. Just to clarify; a strobe is essentially the same as your flash that goes on your camera. It gives a short burst of light, which is a huge advantage when shooting food as it does not nearly get as hot as continuous lights.
The disadvantage ofcourse is that you cannot see what the light does until you take a shot. Most come with a modelling light but if you’re shooting during broad daylight that won’t do you much good and even at night, it doesn’t always paint the correct picture.
So you bought your first studio flash and now what? Think of your flash as an extension of your daylight. The rules of the direction of light are still the same. The only difference is that the size of your light is different to your window. Plus in a way it is more flexible too.
Now let’s start with showing you the setup in daylight. In the picture below I have shot this yoghurt bowl with fruit in the existing daylight, no reflectors used. Light coming from the right.

I placed my studioflash on the left side of the subject. Not because it couldn’t be on the right, but only for myself to be able to move around the studio easier… 😉 The output of your flash is in large part determined by the light modifier or reflector you put on your light. They mostly come with a fairly small reflector which is a round dish, usually silver on the inside from metal which guides the light into certain directions.
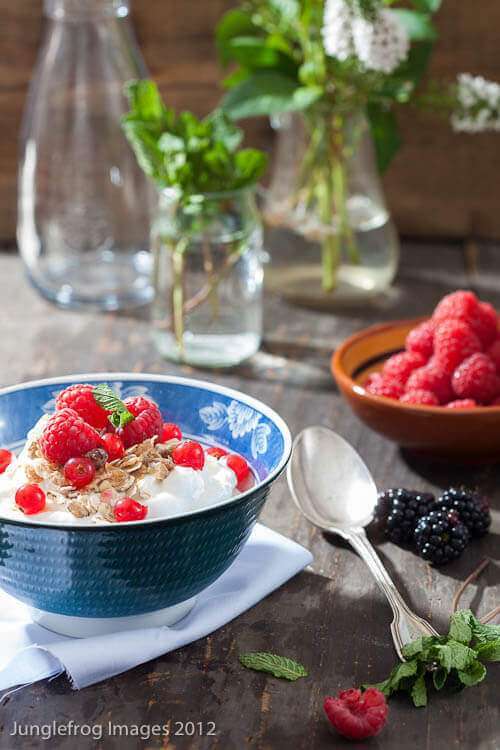
In the above photo I used the naked light. No reflector used, no bounce, nothing. The light is quite bright and clearly coming from the left behind but it is not entirely unusable. If I would have used a reflector on the right it would have been a little softer overall with less shadows even. I could have also turned down the power of the flash a bit softening it up a little. You can also turn the flash towards the ceiling (providing you have a white ceiling!) as that will diffuse the light somewhat too. Depending for a large part also on the distance from your flash to your ceiling.
Now you see that by using only one light you can achieve quite a good result! And while this is shot during daylight hours, the result will be the same if totally dark.
One thing to be aware of when you’re shooting with a studioflash is that you cannot work on aperture priority or any other automatic mode. Manual is the way to go here. You can set your shutterspeed at 1/125s and decide which aperture you want to use. You can then start tweaking your flash power to achieve the desired result. It takes a little bit getting used to but it is really not that hard. Once you get more comfortable with working with the light you can decide to get some different modifiers such as different sizes of reflector, a grid, a snoot or a softbox.
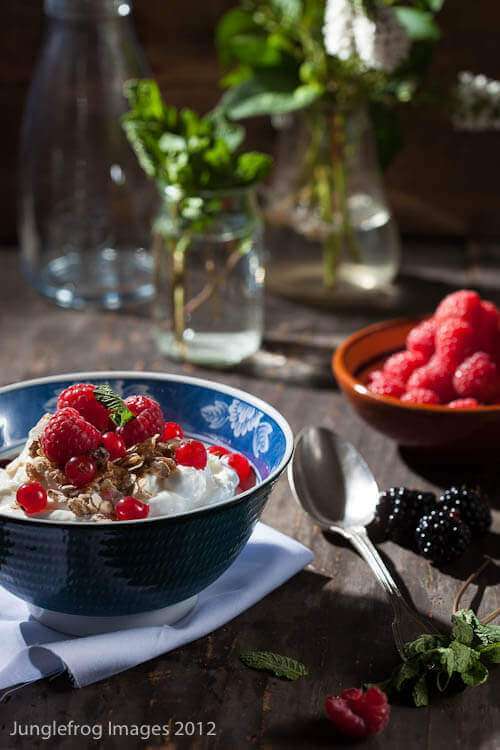
I love using my snoot-attachment on the flash as it gives you very precise control over the light hitting your subject. Photo above is taking with the snoot on. I’ve actually made them myself as well, as it is not that hard. You can take a piece of black cardboard and twist it into a little round tube. Large enough on one side to fit over your flash hit (with a reflector attached) and the other side can be as big or as small as you want. Depending on the effect you want to achieve with your light. And below photo shows you what a snoot actually looks like
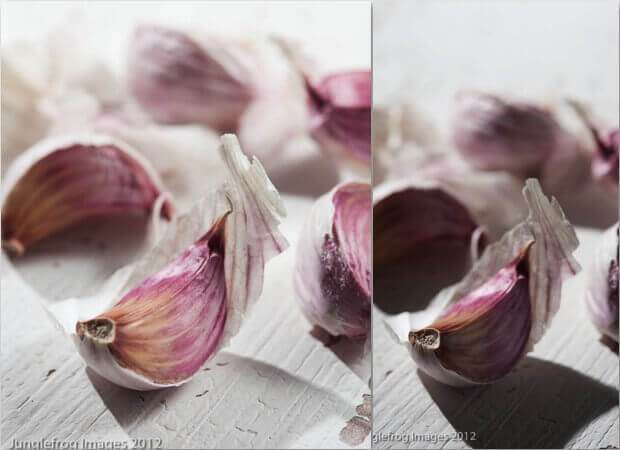
Now when using a snoot the light gets very hard which might work well on certain images but not so well on others. As you can see in the garlic cloves above; the image on the right has very dark and hard shadows. I tried to light it up a little on the right but you can still very clearly see the shadow. That is not always an issue and in a lot of cases it is an advantage but take a look at the daylight picture below of the same garlic and I’m sure you can guess which one I prefer in this case.
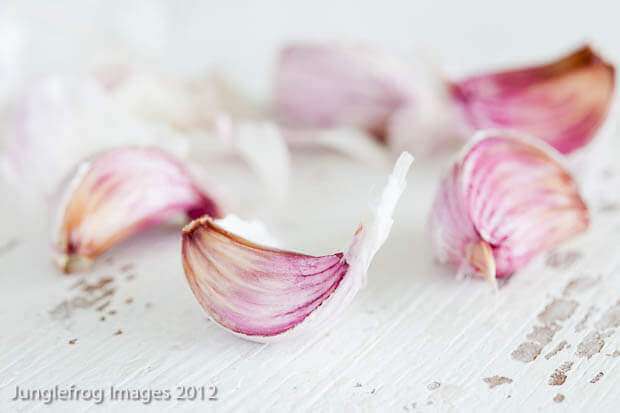
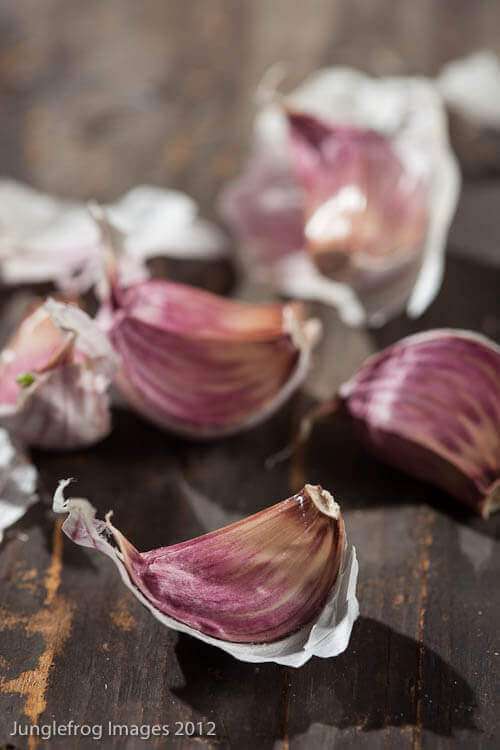
If you’re shooting on a darker background the snoot gets a whole different attraction as you can see by looking at the same garlic cloves below on a darker background. This type of background is much more suited for the use of a snoot. Yes, the shadows are still there but they don’t bother me as much as on the white background
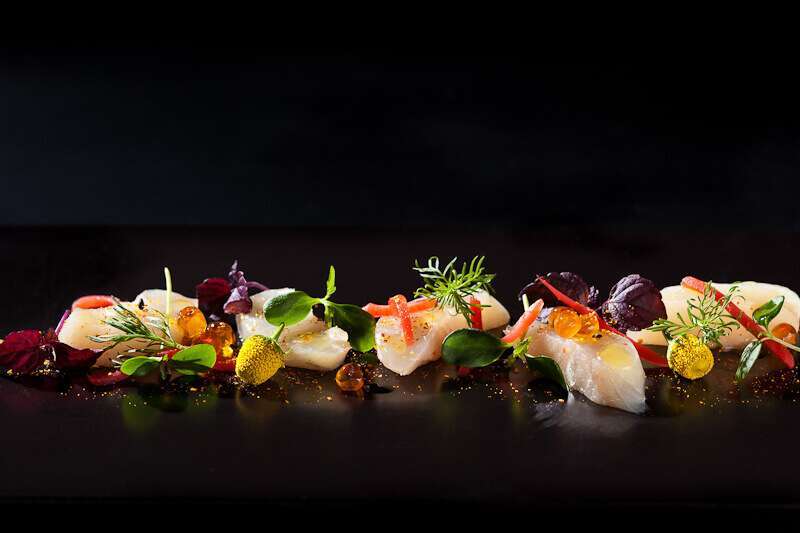
And then an image which was shot for a customer a couple of months ago. I didn’t even have to use a reflector here. The only light coming from that one snoot in the background gave the perfect light for this pretty dish. So it all depends in a large part on your subject, the background you are using and the mood you’re trying to create
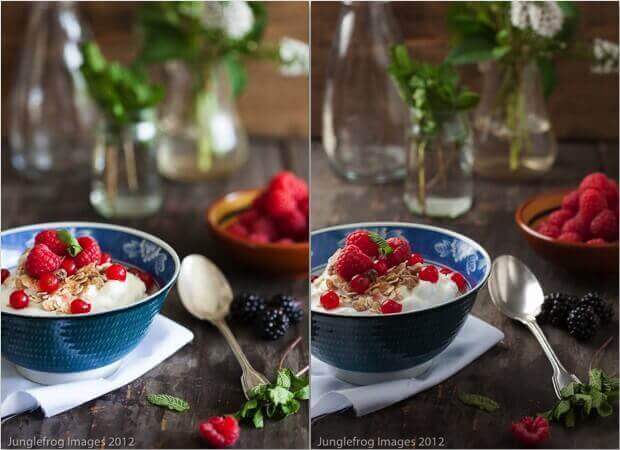
Then besides the snoot and a regular reflector there is the famous softbox. Softboxes come in many different shapes and sizes. The bigger the softbox in general, the bigger the diffusion gets as well. it softens the light in a pleasing way and if you manage it correctly you can definitely make it look like daylight. The very first image on top of this (long!) post is shot on the right with a softbox and on the left with daylight. Now ofcourse I didn’t specifically try to recreate the same feeling in both pictures and they’re not but you can probably see that by making just a few small adjustments you would be able to replicate the daylight effect with the softbox.

So with having said that I am going to conclude this long post. I hope you found it useful and if you need any additional information or would like me to address a different kind of artificial light just let me know!
Very interesting. Thanks for sharing.
your pictures are wonderful.
Cheers,
Rosa
Thanks so much Rosa!
Great tutorial! I love studio strobes, and once you learn how to use them it’s hard to use anything else (except for exceptional daylight — but I tend to shoot at night, so that’s not really an option!). I like making snoots out of Rosco cinefoil (it’s like heavy duty black aluminum foil) — it’s very easy to shape, Good post — thanks.
O that’s great to know John. I do have a ‘normal’ snoot as I used it so often it was a good thing to buy one, (looks slightly more professional when working with clients too…lol) I still prefer my daylight though but when you shoot at night, it is essential to have artificial lights!
I have a couple of softboxes but they weren’t very expensive. I need to play around with them a bit more. Great post.
Thanks Maureen. It’s fun to play around with lights!
This is very helpful and at the same time very interesting…I need to learn so much. 🙂
Thanks for this timely and wonderful post Simone. I was planning to rent some lights over the weekend and I’m already confused! So, I have the option of buying two 400 watt lights with softboxes or 200 watt ones. I have a feeling that I don’t really need 400 watt for food photography. What do you think it a good option? Thanks!
He Kulsum,
I think you’re probably fine with the 200 watt lights. It kind of depends if you are using them in a really large space or need a lot of power, but in general I don’t really use my 500 watt ones at more than half of their power. Sometimes I need it though when I am moving them further away to create some special effect. If the difference in price is minimal than go for the 400 (arguing that you might need it at some point in the future.:) . If it is a lot more power, than go for the 200!
Kulsum,
There are some excellent 100 Ws flashes that are just great for food photography. They’re called Elinchrom D-Lite RX One and they’re really cheap. Elinchrom is one of the leading flash manufacturers and even the cheap RX One’s are high quality.
If you purchase a kit with 2 or 3 flashes and stands + softboxes or umbrellas, you also get their radio transmitter, which is very good. 100 Ws is more than enough, with the added advantage that you can get the minimum power very, very low.
Cheers.
The use of a strobe light really brings the food to life and makes it easier to see the details.
Thanks for the article. This is quite helpful for the wannabe food photographer like myself.
I’ve never shot natural light. I’ve always used 2 light set up on a speedlight. It works for me.. but sometimes I wonder what else can I do? This 2 light set up is getting boring for me.. but then.. what can i do if I want to go commercial?
Hi Jojie,
There is tons of stuff you can do.. 😉 I would suggest trying and using various attachments to your lights and go with one maybe instead of the two lights. Or try daylight… I love daylight!
Very interesting post. I am trying to improve my food photography and I absolutely love pictures of Aran Goyoaga on her blog Canelle de Vanille. Any suggestions how she is able to achieve the lighty/soft/airy look on her photos? I currently shoot with Canon 40D in a daylight, but my photos are never as.. soft… What do you think? (example of her pictures: http://1.bp.blogspot.com/-R97gyPAj6pQ/TgX_J15AMbI/AAAAAAAABps/KIAuUIFmgyk/s1600/11.jpg)
Thank you
Hi Zoey,
I’d say thats best to ask Aran…:) I do know she uses daylight and I love her work too but for how she does it exactly ask her…
Hi Simone
Yes great article i love daylight ideally.
Would you know the answer to this?
I have access to a portrait studio with a north facing window. If im using flash at what point (shutterspeed) would daylight ‘effect’ the image please
Thank martin
He Martin
It’s a bit depending on the amount of daylight but technically as soon as you start using shutter speeds lower than 1/60 you start to use the ambient light. The lower the shutter speed the more you’d use the natural light. Does that make sense?