Using artificial lights: Ikea lamps
Taking photos of your food in the dark months of the year
We all know it; that terrible lack of light that hits you around 4 pm in the darker months of the year. It becomes harder and harder to take decent photographs as the season progresses. You’re left with two options; either to photograph your food the next day or to resort to artificial lights. Last year I gave a couple of workshops around artificial light and how to use cheaper options to still take photos in the winter, but because of my somewhat ridiculous schedule I decided to put it on paper. If you have any questions or maybe some tips yourself feel free to share it in the comments below. I will do a series, starting with the low budget options of Ikea lights.
I’ve written a couple of posts in the photography tips section before and you can find them all here. But anyway, Ikea lights. I am not sponsored by Ikea and you can – of course use any kind of similar light, but I just know these work well and are cheap so that is what I am going for.
 To start with; the type of light you want to use is called Jänsjo and costs around € 9,99 here in the Netherlands but I know they can be found around the world. Possibly for slightly different prices. You have two variaties; one with a clip to put to the side of the table or one with a foot. You want the last one so you have more space to move around your light. I don’t like to be limited to the side of the table.
What you need for making the photos:
- two lights
- 2 pcs of foam board
- 1 diffuser (you can also use thin white curtains, baking paper or tracing paper or anything that lets the light through but makes it softer)
- your camera obviously
- a tripod (you cannot do without with shots like this)
- preferably a long table
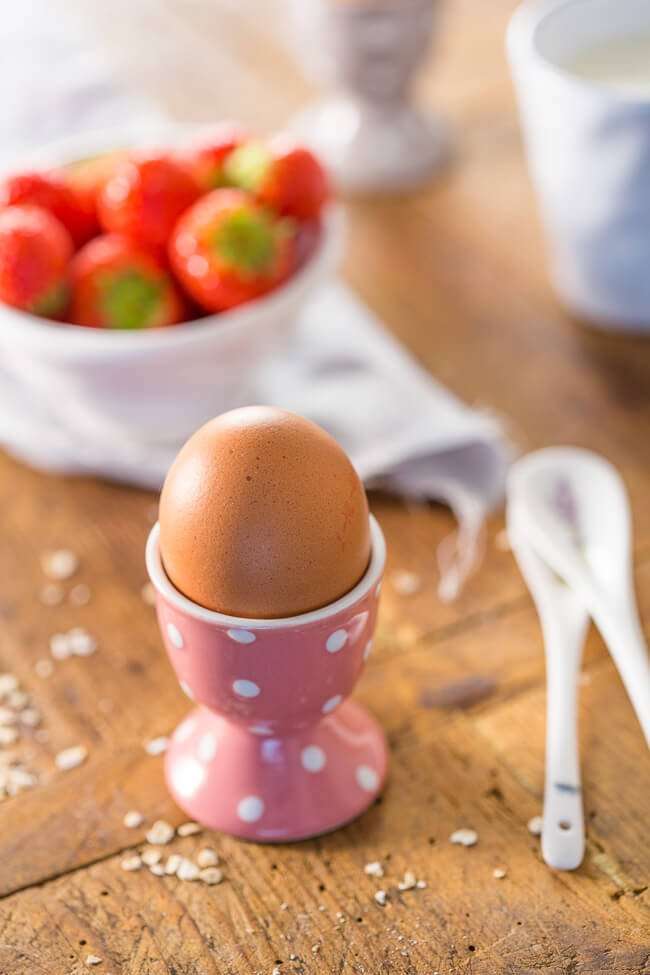
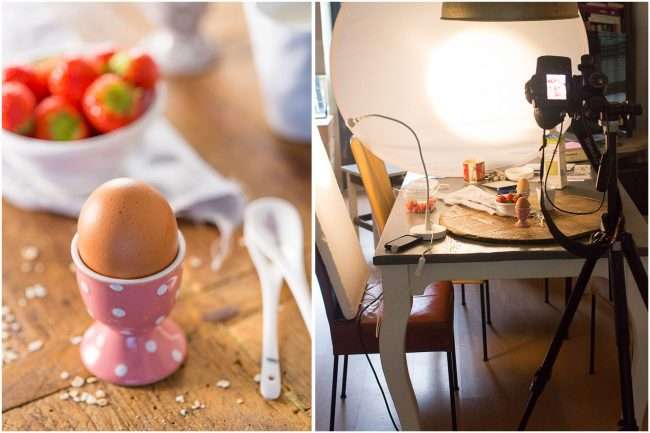
Step 1 ; position one light behind the subject at an angle (see example above)
I love backlighting so that is the setup I have build here. Depending on your subject you can obviously vary this, but the important thing is that you understand how the lights work and how to build your set around it. In the photo above you see the result with just the one lamp, without any correction. You position the first light behind your subject at a slight angle. You can turn the head of the lamp until you think you have light that is pleasing to your subject. As you can see you have harsh shadows and a lot of it in front of the subject and a lot of light coming in from the back. So we need to balance this better.
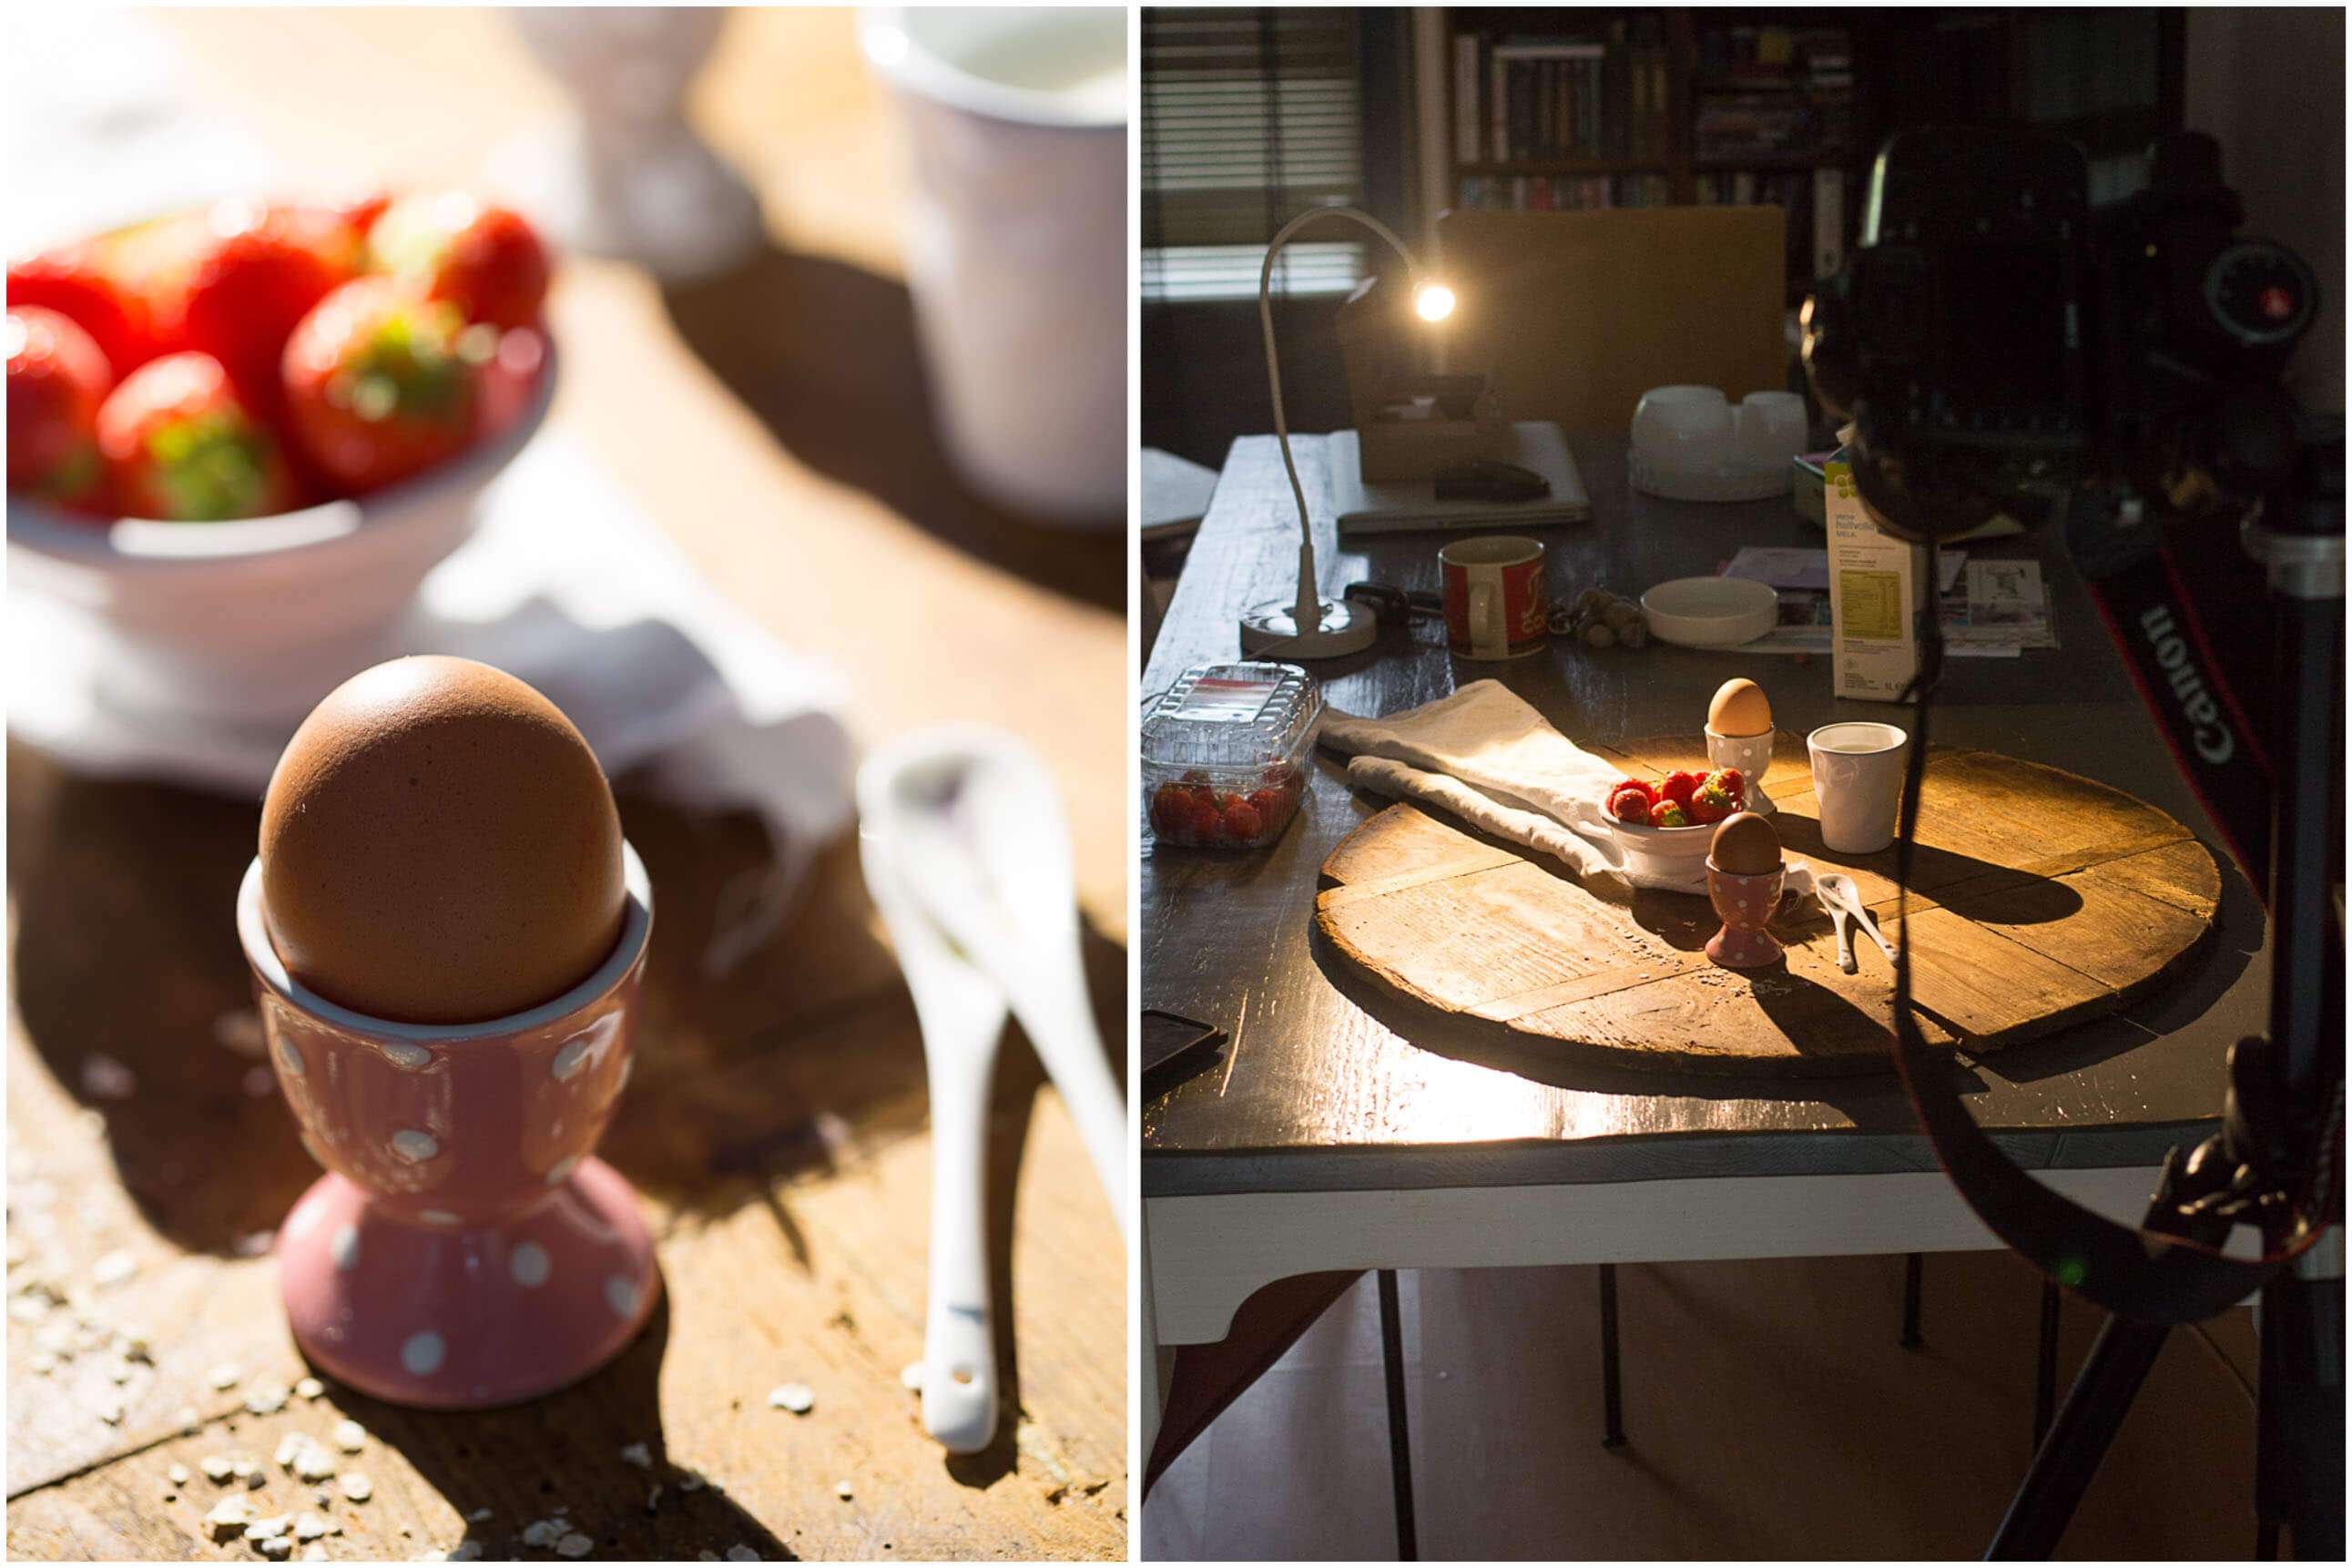
Step 2: adding reflective material
To brighten the shadows a bit I use a piece of foamboard on the right side of my subject. As you can see the egg becomes a bit lighter now on that side but there are still harsh shadows and overall it is too dark still. Time to add a second light to the set.
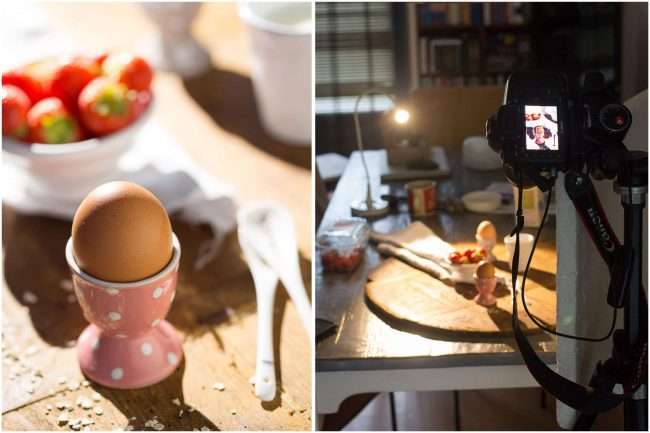
Step 3; one light directly on the subject and the other indirect through another piece of foam
With the third setup I added an extra light on the leftside of the subject. This one I bounce with another piece of foamboard. So not directl onto the subject but bouncing it from a white surface. You can see in the last photo where that foamboard is positioned. I tend to place it on a chair so it’s pretty sturdy.
As you can see the light is still not great. It’s a bit too dark, but you can see that the egg is starting to look like an egg in comparison to the first two pictures and the shadows are less harsh.
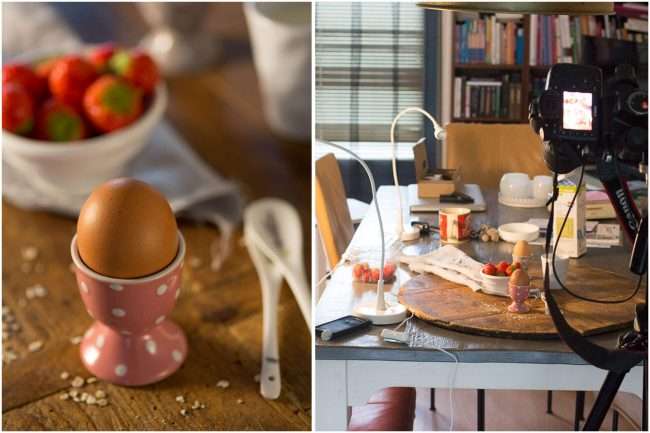
Step 4; diffuser
In the last step I add a diffuser in front of the first light that is coming from behind. That way you make the light from behind much softer and the shadows a lot more pleasant to look at. If you do not have a diffuser you can also use another piece of white material to bounce the backlight indirectly onto the subject. That will also make it softer. I choose not to because I do like a bit of contrast but both would work. Make sure you check your light as you will lose some brightness by bouncing it, so adjust your settings accordingly.
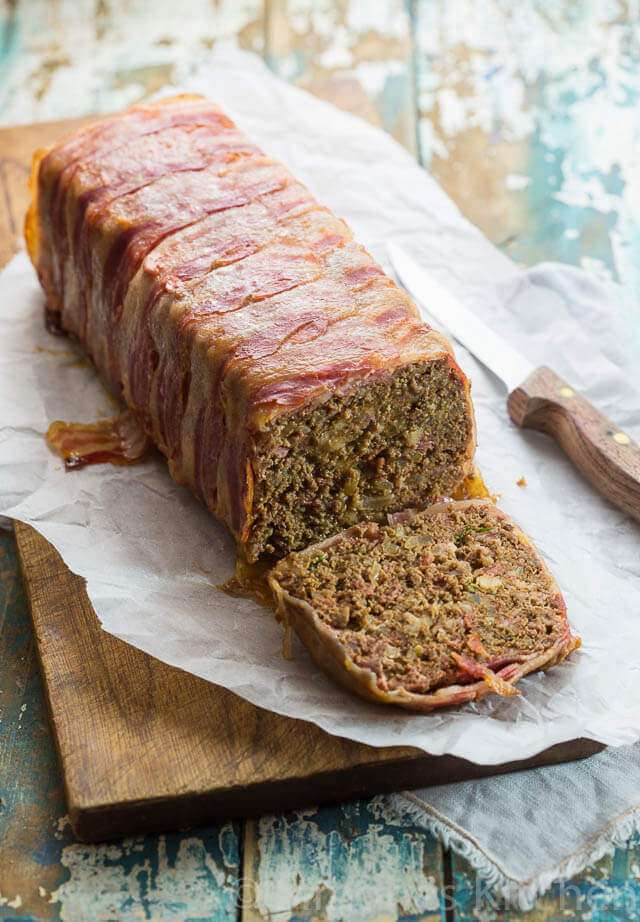
And that is basically it. The led lights are fairly neutral in terms of color of the light. A bit more yellow than natural daylight but I find it overall quite acceptable to work with. Below a few examples of photos that I used the Ikea lights on last winter.
Next week I will show you how to use one single studio flash to replicate daylight almost perfectly. It is slightly more expensive than the Ikea lights but is also more flexible and will give you a better control of the light.

Dear Simone,
thank’s for your tips. I will try :-)!
xxx – Claudia
Great Claudia! Let me know if you have any questions!
Hi Simone!
I love this post! I’m really struggling to make any nice food shots when the days are so short…so this is a big help! Do you know when you will publish the post about using the studio flash light?
Thank you!
He Agata. That should be within the next two weeks!
Such a helpful post! I already bought my IKEA lights and can’t wait to try them out.
Hi Simone,
I’m not able to see examples for this post?
Thanks!
he Anna. O that’s odd! I fixed it now so you should be able to see the example pics again! Thanks for letting me know!