Tiramisu from scratch; Daring Bakers
I was quite excited when I read what the Daring Bakers challenge for this month was gonna be… Tiramisu… And it would be hosted by two of my favorite blogs! Tiramisu is an old time favorite in this household and in fact something I make almost every year for New Years when we go and visit friends. It’s become one of those things where people are really disappointed when you do not bring a bowl full of the creamy goodness. My recipe for tiramisu is quick and simple and I might share it some other time, but for now let’s focus on the DB tiramisu!
The February 2010 Daring Bakers’ challenge was hosted by Aparna of My Diverse Kitchen and Deeba of Passionate About Baking. They chose Tiramisu as the challenge for the month. Their challenge recipe is based on recipes from The Washington Post, Cordon Bleu at Home and Baking Obsession.
For this challenge the mandatory things to do where to make our own ladyfingers and… to make our own mascarpone! It’s one of those where you seriously have no idea how things are made. Ok I realize that mascarpone is dairy but that doesn’t mean anything. Little did I know that it would be straightforward to make (I did not think it was that straightforward while making it but trust me things turned out to be different then expected!) I started making all the various parts of the challenge on the sunday so I would have enough time for the tiramisu to be assembled and then photographed as well. I started by making the pastry cream and the zabaglione, which were both very easy to make. Next was the ladyfinger batter which was also not difficult to do except for the fact that I felt that they became soft rather quickly even though I kept them in an airtight container only for one night. It didn’t really matter ofcourse since they were gonna be soggy anyway but still. It did suprise me and on second thought I might have had to keep them in the oven a tiny bit longer to get rid of that issue. But then who knows? I also didn’t make enough of the cookies. I didn’t count them and figured I would have enough for what I wanted to do so I didn’t finish all the batter. Mistake…!
Not a major disaster and I managed with what I had but just barely and would I have had more cookies it would have been easier to divide.
When the cookies where in the oven I started on the mascarpone making, which is essentially cream that needs to be cooked till 190 degrees F. I used a double boiler as per the recipe but the warming up took for-ev-er and once bubbles tried to break through the surface I added the lemon juice as per the instructions and that is where the cream should have started to curdle. Now…. that is one of those words that I think I know what it means but it might actually be something else; in which case I was waiting for something that would never happen…lol… In any case it was supposed to get thicker and that it did not do. No matter how long I waited and no matter that I turned the heat up a bit, adding more lemon juice.. All to no avail. After what felt like a century but what was in fact something like 45 minutes I gave up and figured I just dump the stuff into the sieve and see what would happen the next day. I didn’t have cheesecloth so I used a cotton teatowel instead. I read on the DB forum that I was not the only one having issues with the mascarpone, so I dreaded the moment the next day where I would find only a little bit of cheesy goodness left and a major amount of fluid under the sieve.
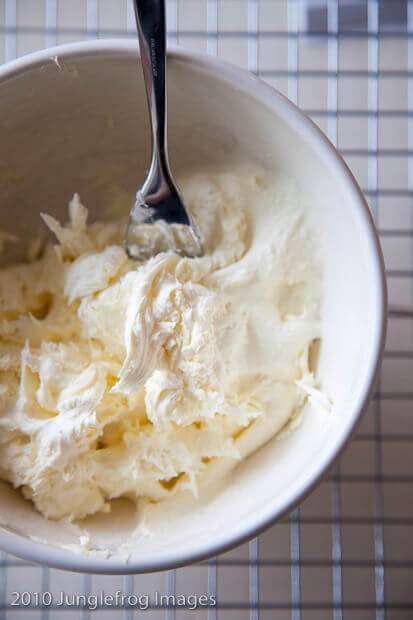
So guess my total surprise when I peeked into the fridge the next morning to find a perfect batch of creamy and delicious mascarpone! 🙂 Magic… pure magic… It had the right consistency and if anything, was even slightly firmer then the storebought varieties and the taste was good too.! I had honestly already agreed with myself that I would use storebought if it was a total drab, but this was ofcourse even better!!
So with the mascarpone successfully behind my back there was really nothing holding me back from assembling the tiramisu. O I have to tell you that I do not like rum or marsala so whereever the recipe called for something alcoholic I used amaretto instead. Ever since I started making tiramisu I have used amaretto instead of the regular rum. And believe me when I say it is irresistable. Really, really good. It gives it a slight almond flavor too. But then I love amaretto so you might not like it so much if you don’t like amaretto.
I wish I actually had a before and after picture of the mascarpone but I didn’t feel like taking a photo of the cream as it really did not look any different from when I started, but as you can see on the ‘after’ photo; it is looking good!!
For the dipping of the ladyfingers I used again amaretto and not so much sugar as the recipe said either. I am used to not using any sugar at all for the dip, so I just added a tiny bit in and diluted the coffee with about a tablespoon of amaretto.
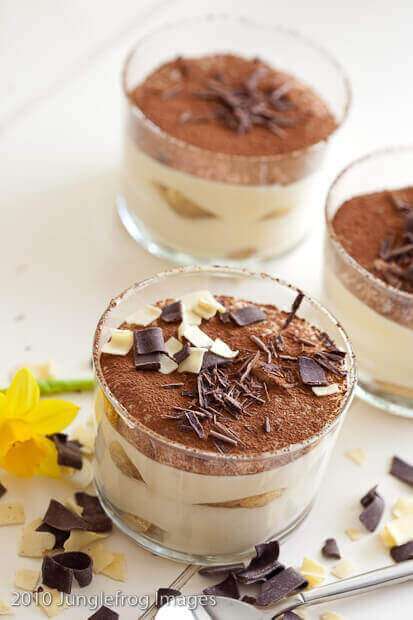
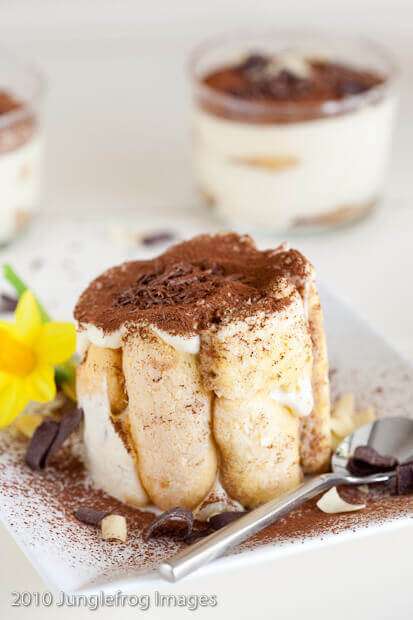
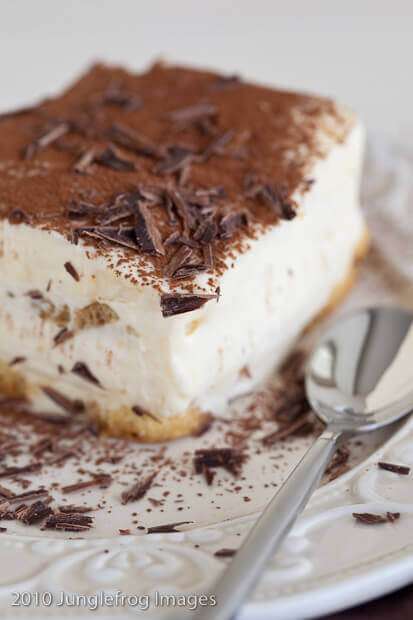
I could really not dip both sides of the tiramisu since that was just too much liquid, plus I don’t like those soggy tiramisu’ that you buy in the supermarket… Yuck…! I wanted to try a variety of forms, but I actually like the glasses the best. Not only because it stays together but I love to peak through the glass and see the ladyfingers there; hiding. I did the glasses, one round form and one square… The ring of the round one should have been a little wider as you will see in the picture somewhere below; because the ladyfingers got wet so quickly they also got quite limp so it was difficult to keep them up as I wanted to have a ring of ladyfingers around the outer edge on the round form. Right now it looks kind of weird and wobbly (but hey, definitely homemade!)
And then for the most important part; the taste… O the taste… I can’t find much wrong with the taste. In fact I absolutely love it. It has a very slight lemon flavor which I love and overall this is a really really good tiramisu. Truth be told; I will probably stick to my regular tried and tested recipe as it is a zillion times quicker and tastes just as good. I did love making my own mascarpone and after that fear of failure it turned out to be pretty straightforward as I promised you!
Now for all who want to try this; here is the recipe(s)!
Tiramisu

Ingredients
- FOR THE ZABAGLIONE;
- 2 large egg yolks
- 3 tablespoons sugar/50gms
- 1/4 cup/60ml Marsala wine or port or coffee
- 1/4 teaspoon/ 1.25ml vanilla extract
- 1/2 teaspoon finely grated lemon zest
- FOR THE VANILLA PASTRY CREAM;
- 1/4 cup/55gms sugar
- 1 tablespoon/8gms all purpose flour
- 1/2 teaspoon finely grated lemon zest
- 1/2 teaspoon/ 2.5ml vanilla extract
- 1 large egg yolk
- 3/4 cup/175ml whole milk
- FOR THE WHIPPED CREAM;
- 1 cup/235ml chilled heavy cream we used 25%
- 1/4 cup/55gms sugar
- 1/2 teaspoon/ 2.5ml vanilla extract
- To assemble the tiramisu:
- 2 cups/470ml brewed espresso warmed
- 1 teaspoon/5ml rum extract optional
- 1/2 cup/110gms sugar
- 1/3 cup/75gms mascarpone cheese
- 36 savoiardi/ ladyfinger biscuits you may use less
- 2 tablespoons/30gms unsweetened cocoa powder
- FOR THE LADYFINGERS approx 24 big ladyfingers
- Ingredients:
- 3 eggs separated
- 6 tablespoons /75gms granulated sugar
- 3/4 cup/95gms cake flour sifted (or 3/4 cup all purpose flour + 2 tbsp corn starch)
- 6 tablespoons /50gms confectioner's sugar
- For the zabaglione:
- Heat water in a double boiler. If you don’t have a double boiler, place a pot with about an inch of water in it on the stove. Place a heat-proof bowl in the pot making sure the bottom does not touch the water.
- In a large mixing bowl (or stainless steel mixing bowl), mix together the egg yolks, sugar, the Marsala (or espresso/ coffee), vanilla extract and lemon zest. Whisk together until the yolks are fully blended and the mixture looks smooth.
- Transfer the mixture to the top of a double boiler or place your bowl over the pan/ pot with simmering water. Cook the egg mixture over low heat, stirring constantly, for about 8 minutes or until it resembles thick custard. It may bubble a bit as it reaches that consistency.
- Let cool to room temperature and transfer the zabaglione to a bowl. Cover and refrigerate at least 4 hours or overnight, until thoroughly chilled.
- For the pastry cream:
- Mix together the sugar, flour, lemon zest and vanilla extract in a medium heavy-bottomed saucepan. To this add the egg yolk and half the milk. Whisk until smooth.
- Now place the saucepan over low heat and cook, stirring constantly to prevent the mixture from curdling.
- Add the remaining milk a little at a time, still stirring constantly. After about 12 minutes the mixture will be thick, free of lumps and beginning to bubble. (If you have a few lumps, don’t worry. You can push the cream through a fine-mesh strainer.)
- Transfer the pastry cream to a bowl and cool to room temperature. Cover with plastic film and refrigerate at least 4 hours or overnight, until thoroughly chilled.
- For the whipped cream:
- Combine the cream, sugar and vanilla extract in a mixing bowl. Beat with an electric hand mixer or immersion blender until the mixture holds stiff peaks. Set aside.
- To assemble the tiramisu:
- Have ready a rectangular serving dish (about 8" by 8" should do) or one of your choice.
- Mix together the warm espresso, rum extract and sugar in a shallow dish, whisking to mix well. Set aside to cool.
- In a large bowl, beat the mascarpone cheese with a spoon to break down the lumps and make it smooth. This will make it easier to fold. Add the prepared and chilled zabaglione and pastry cream, blending until just combined. Gently fold in the whipped cream. Set this cream mixture aside.
- Now to start assembling the tiramisu.
- Workings quickly, dip 12 of the ladyfingers in the sweetened espresso, about 1 second per side. They should be moist but not soggy. Immediately transfer each ladyfinger to the platter, placing them side by side in a single row. You may break a lady finger into two, if necessary, to ensure the base of your dish is completely covered.
- Spoon one-third of the cream mixture on top of the ladyfingers, then use a rubber spatula or spreading knife to cover the top evenly, all the way to the edges.
- Repeat to create 2 more layers, using 12 ladyfingers and the cream mixture for each layer. Clean any spilled cream mixture; cover carefully with plastic wrap and refrigerate the tiramisu overnight.
- To serve, carefully remove the plastic wrap and sprinkle the tiramisu with cocoa powder using a fine-mesh strainer or decorate as you please. Cut into individual portions and serve.
- For the ladyfingers:
- Preheat your oven to 350 F (175 C) degrees, then lightly brush 2 baking sheets with oil or softened butter and line with parchment paper.
- Beat the egg whites using a hand held electric mixer until stiff peaks form. Gradually add granulate sugar and continue beating until the egg whites become stiff again, glossy and smooth.
- In a small bowl, beat the egg yolks lightly with a fork and fold them into the meringue, using a wooden spoon. Sift the flour over this mixture and fold gently until just mixed. It is important to fold very gently and not overdo the folding. Otherwise the batter would deflate and lose volume resulting in ladyfingers which are flat and not spongy.
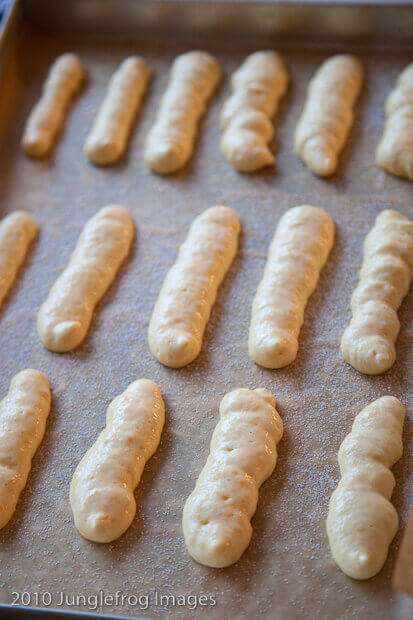
- Fit a pastry bag with a plain tip (or just snip the end off; you could also use a Ziploc bag) and fill with the batter. Pipe the batter into 5" long and 3/4" wide strips leaving about 1" space in between the strips.
- Sprinkle half the confectioner's sugar over the ladyfingers and wait for 5 minutes. The sugar will pearl or look wet and glisten. Now sprinkle the remaining sugar. This helps to give the ladyfingers their characteristic crispness.
- Hold the parchment paper in place with your thumb and lift one side of the baking sheet and gently tap it on the work surface to remove excess sprinkled sugar.
- Bake the ladyfingers for 10 minutes, then rotate the sheets and bake for another 5 minutes or so until the puff up, turn lightly golden brown and are still soft.
- Allow them to cool slightly on the sheets for about 5 minutes and then remove the ladyfingers from the baking sheet with a metal spatula while still hot, and cool on a rack.
- Store them in an airtight container till required. They should keep for 2 to 3 weeks.
Disclaimer
The nutritional values above are calculated per portion. The details are based on standard nutritional tables and do not constitute a professional nutritional advice.
Hi Simone, where is the ladie fingers recipe or am I blind…..?
Would love to give this a try.
xox
Karin
You weren’t blind.. I kind of missed somehow copying this so I have now added it in! Good luck and let me know how it turned out!