How to make halloumi cheese
As part of a challenge about cheesemaking I made my own halloumi. In this post I outline how to make halloumi cheese at home. It’s easier than you might think!

How to make halloumi
Halloumi is by far one of my favorite cheeses. It is delicious in all kinds of salads, you can bake it, fry and do things to it without the halloumi melting. The only thing that doesn’t work so well is to eat halloumi without actually baking or frying it. Raw halloumi is not that appealing. This post is rather picture heavy as I will be taking you through the process of how to make halloumi from scratch.
This cheese making session was part of the cheesepalooza challenge which ran years ago but got me to make ricotta and goat cheese as well. So much fun to do!
First some details; originally halloumi is made with goat- and or sheeps milk. I had neither on hand so I decided to go for regular cow’s milk. That is also fine and can be used to make halloumi. Keep in mind to not use milk that is too pasteurized. Best to use raw milk if you can find it. That works best for any kind of cheese as I have also found when making the goat cheese. But in this case it also worked with pasteurized, organic full fat millk.

The starter
In order to get the cheese making process going you need to use a starter. In the original recipe by Mary she mentioned to use a mesophilic starter. I had no idea what that was, but upon asking it in the store where I got all the other cheese making supplies they said it was basically a fancy name for buttermilk. For this particular recipe I went with rennet but will definitely be trying it with buttermilk for next time.
Get the process going
In order to start the process, the firs thing you do is heat the milk to 32˚C. I chose a recipe I found on Peasepudding site. Upon scanning the recipe I realized I had those ingredients on hand and it sounded good.
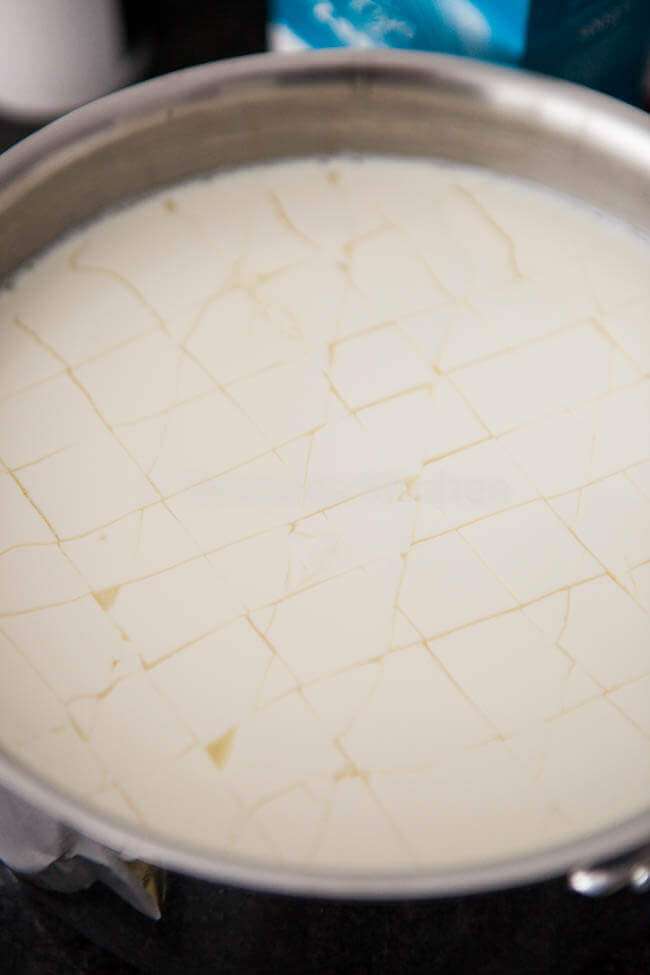
After heating the milk you let it sit in an undisturbed place for about 20 minutes after adding the rennet. Mine didn’t look firm enough after 20 minutes, so I let it sit for another 20 minutes and that made the curd separate a bit better from the whey. It helps quite a bit that I have done this process now a couple of times. I knew what to look out for. Even though the outcome of all cheese is different, the process of making it is remarkably similar.
Reheat
The next step is to reheat the curd to around 35-38˚C. You have to gently stir the mixture for 20 minutes while at the same time keeping the temperature consistent. That was rather hard to do on the stove so instead I placed the pan in a water bath at the right temperature and kept it there.
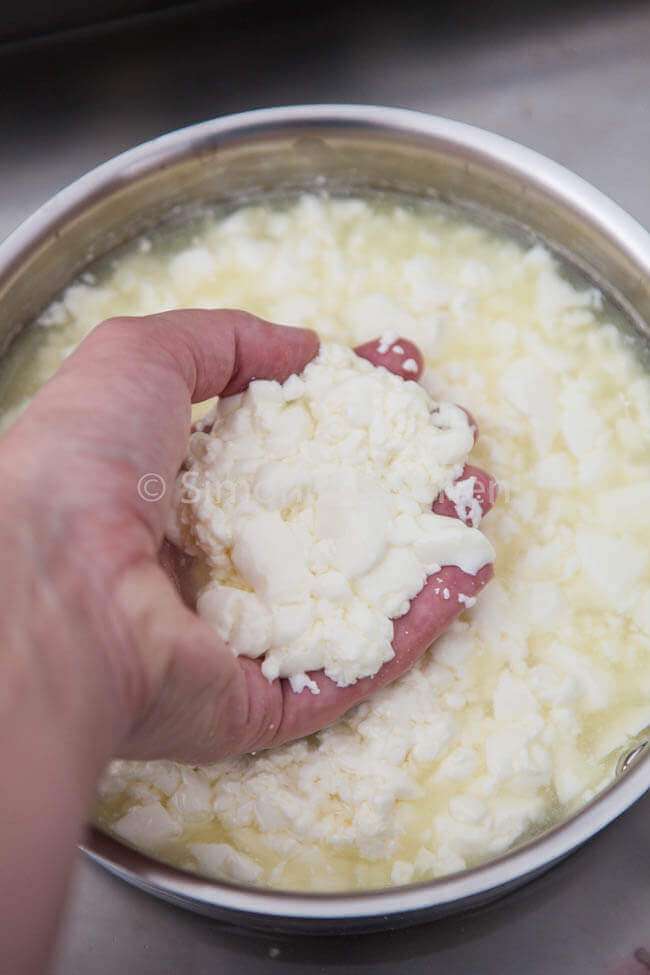
Separating the whey from the curd
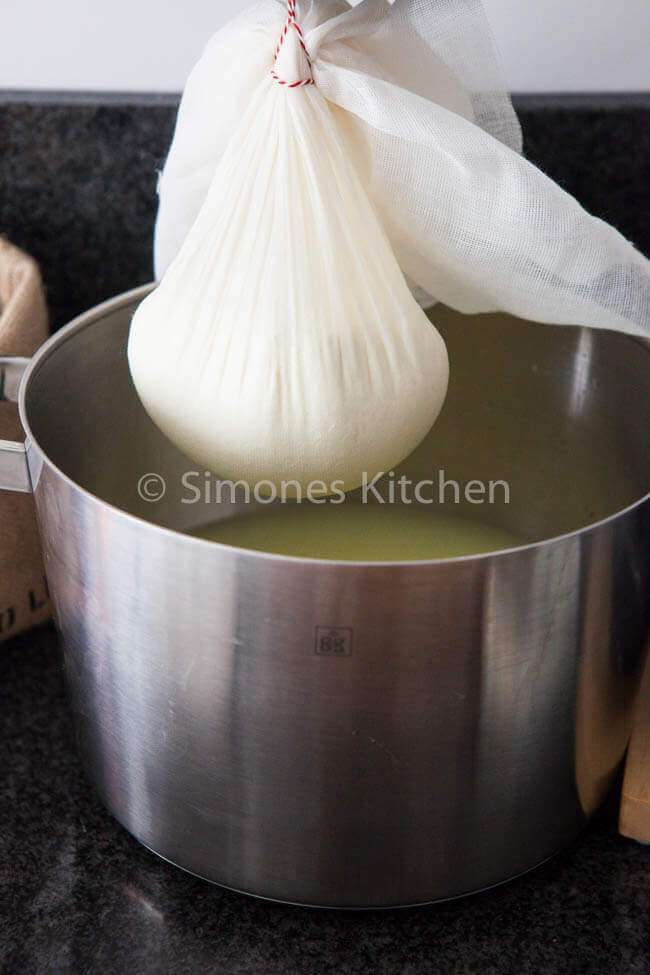
The next step in the process is to lift the curd from the pan and let it drain. This is best done in a (large) colander lined with cheese cloth. I just poured in the whole pan contents (in stages) and let it sit for about half an hour. Make sure to safe the whey. You will need that at a later stage for making the halloumi.
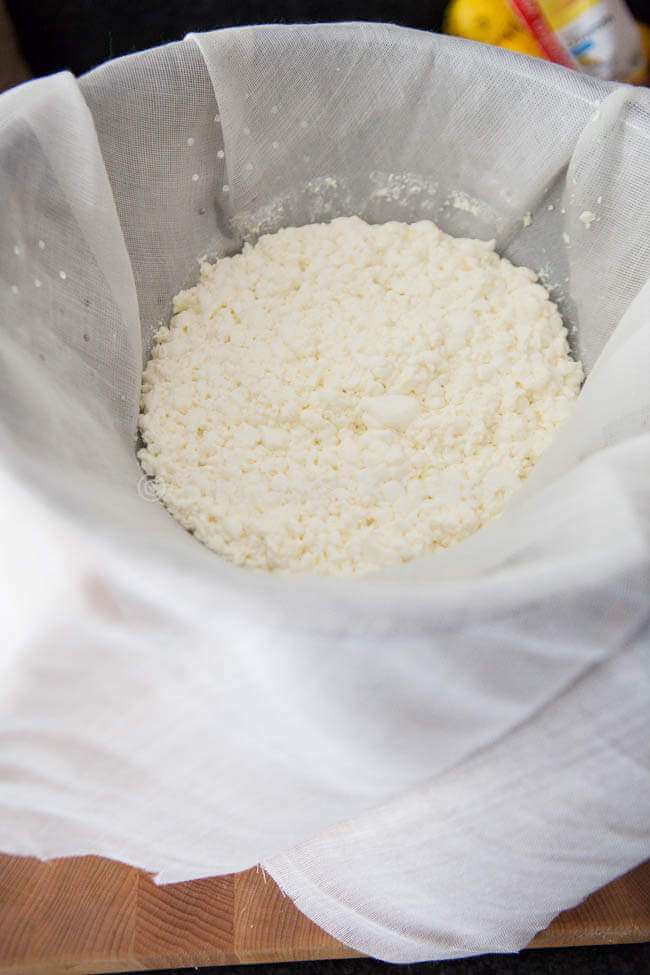
After the half hour is over you transfer the curd to a cheese mold. I had already prepped the mold which was lined with cheese cloth and ready to go. Once the curd is inside the mold you place a weight on top and let it sit and solidify. All the fluid needs to be drained from the cheese. How long this process takes depends on the type of milk you have used. Did you use raw milk? In that case you will probably need about 30 minutes for the halloumi to be firm enough. In my case, I needed around two hours to drain all the whey. The chemical reaction of processed milk in comparison with raw milk is different so the times will vary depending on the brand you use.

Equipment needed for making halloumi
The process for how to make halloumi can be a bit daunting. I’m trying to break it down into manageable pieces. First the equipment you must use.
- big soup pan
- food thermometer
- cheese cloth
- big colander
- cheese molds
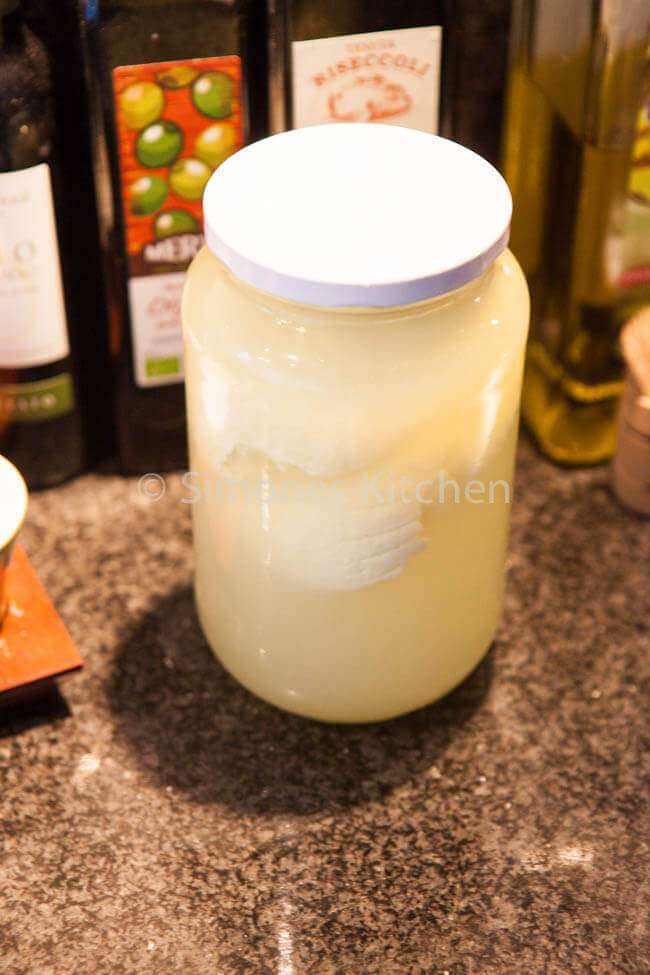
- big jar to store the finished product
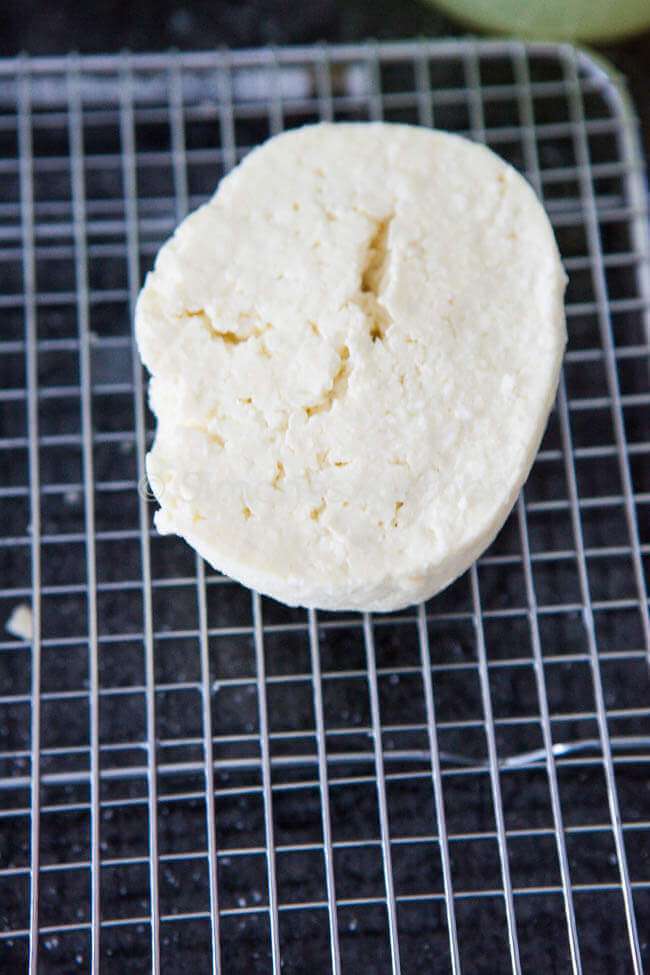
Reheating the halloumi
The next step in the process of how to make halloumi is the reheating of the pressed halloumi. If you take a look at the picture above, you might conclude that it could have been a bit firmer. I hesitated but placing it back in the mold didn’t seem like such a good idea. So I went with the flow. For this next step you cut the halloumi into slices of about 1-2 centimeter thick. You use a large pot to put all the whey that you extracted from the halloumi in and you heat it as close to 90˚C as you can get it. Place the slices of halloumi in the heated whey and let it sit for about 20 minutes.
According to the instructions the halloumi should float to the surface once it done, but since mine floated instantly I figured I just let it sit for 20 minutes and hoped it was ok. I was somewhat afraid my halloumi would start to integrate but it didn’t. Once cooked you take out the slices and let it drain on a cooling rack. Sprinkle some sea salt on before you place it into the brine. That’s when the waiting part comes.
Homemade halloumi versus store bought
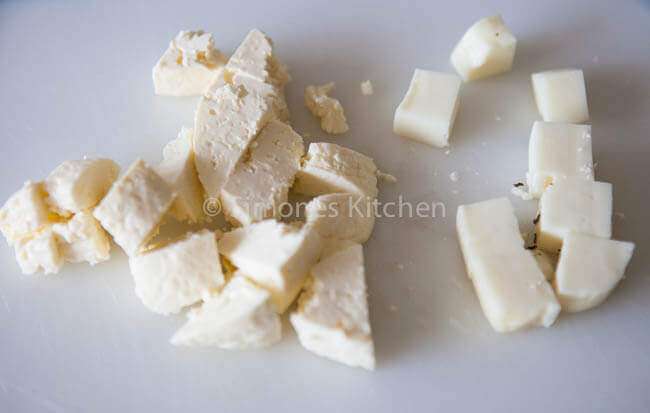
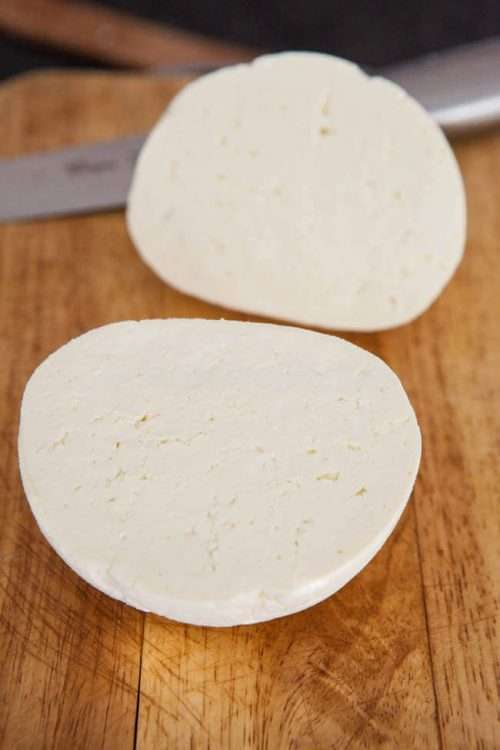
I let my halloumi sit in the brine (in the fridge) for about 3 days before I wanted to test it. I still had a piece of halloumi also that I bought in the store which you see in the picture below. The homemade halloumi is on the left and the store bought halloumi is on the right. As you can clearly see the consistency is totally different. Mine looks a bit more like feta in terms of structure. I decided to bake them in butter as I read that I should do that instead of oil. I will be using oil again next time btw, but that is another story..
How to bake halloumi
Now the funniest thing happened once I put them in the frying pan. The store bought halloumi started to melt as you can clearly see in the picture below and mine stayed fairly firm. I had expected them to fall apart or crumble but it didn’t or at least not as much as I had thought it would.
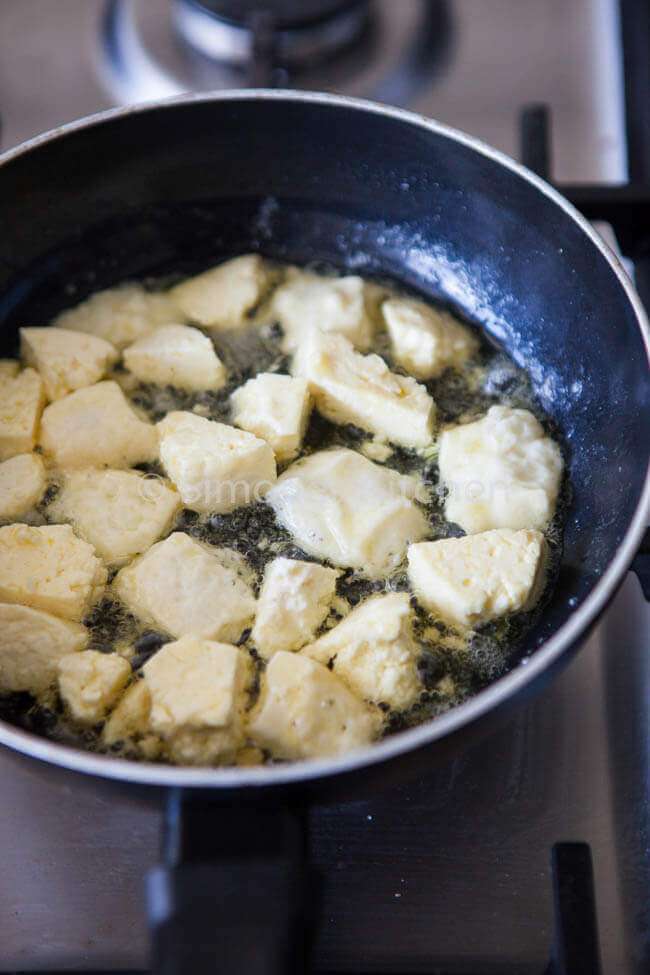
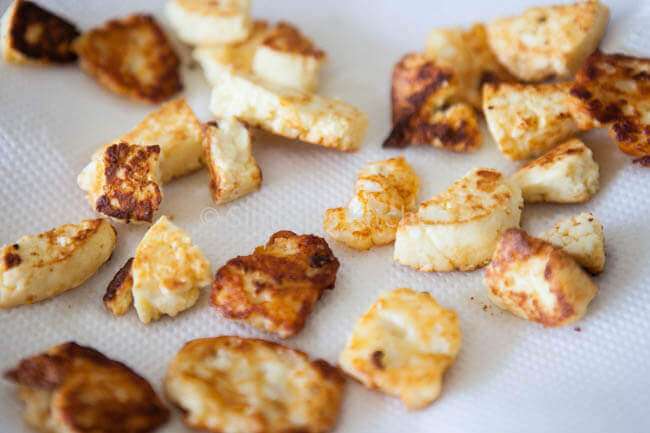
Once fried you can see which ones are storebought and which ones are mine since the flatter ones became a little darker. But that was a really surprising result. The taste was delicious. Crunchy on the outside, nice and salty and maybe a tiny bit too loose in texture.
Halloumi cheese notes
- Appearance: Looked very similar to feta before baking
- Nose (aroma): Not overly smelly at all, neutral
- Overall Taste: Salty
- Sweet to Salty: Salty
- Mild (mellow) to Robust to Pungent (stinky): It’s not an overly strong cheese and quite mellow in taste really
- Mouth Feel: (gritty, sandy, chewy, greasy, gummy, etc.): Close to chewy but not as squeeky as the original halloumi is. Probably due to not being dense enough
O and I like my halloumi better when cooked in oil as the outside becomes much crisper and the browing process doesn’t take as long as with butter since you can heat the oil a little higher.
You can use sheep’s milk, goat milk or cow’s milk. Best is to use raw milk but if you can’t find it, go for organic and full fat. Not highly pasturised.
You can keep the halloumi for up to three weeks if placed in the brine and kept in the fridge
Baking halloumi is best done while shallow frying in oil. You can use butter but I prefer to use oil. I use coconut oil for frying. I heat it on high and quickly brown the halloumi on both sides. Be aware that it can splash so using a splashing shield might be needed.
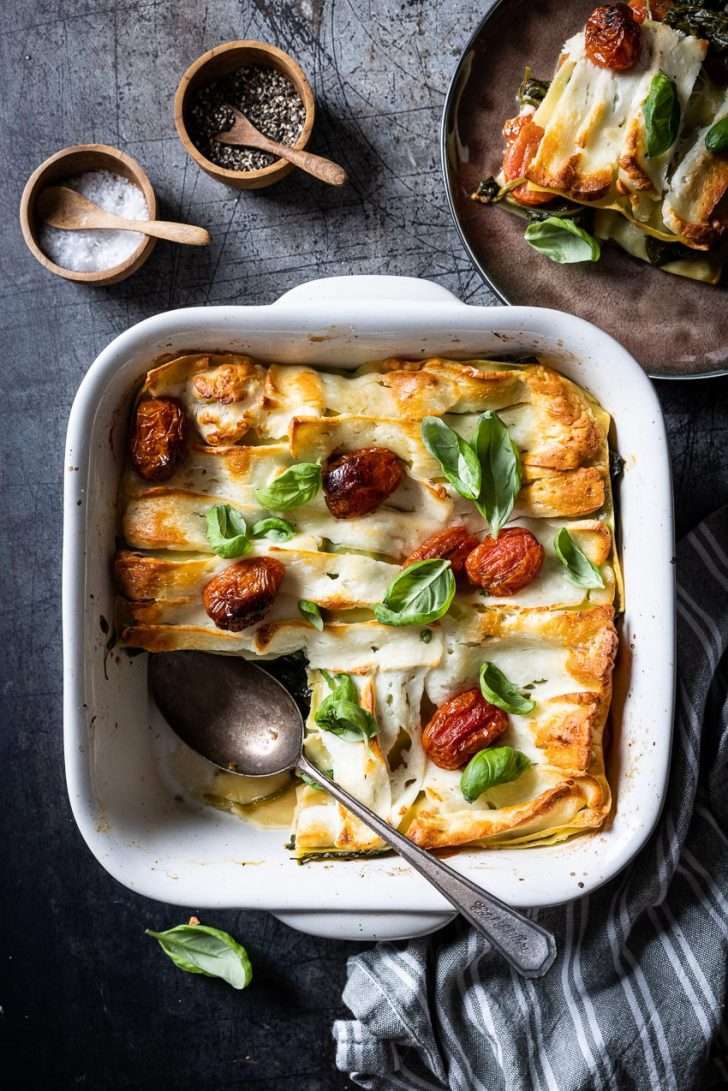
Halloumi is perfect for frying and grilling as it keeps it shape when heated. In contrast to most other cheeses. That said; it will melt eventually so it’s best to fry or grill it quickly for best results. It’s delicious on salads or in larger pieces on roasted vegetables.
How to make halloumi (from cow’s milk)

Equipment
- 1 soup pan
- cheese cloth
- colander
- cheese mold
- food thermometer
Ingredients
- 2 ltr pasturised full cream milk A2 Meadowfresh (I used organic full fat milk)
- ½ tsp rennet Renco mixed with ½ tsp water
- In a large stainless steel saucepan heat the milk to 32˚C, using a food thermometer.
- Add the rennet when milk has reached 32˚C and stir for a few seconds until you know that it is properly distributed.
- Let the milk sit with a lid on the pan in an unheated oven (this provides an environment that is undisturbed and remains stable in temperature) for about 40 minutes or until a firm curd has formed and the whey is clearly separated from the curd.
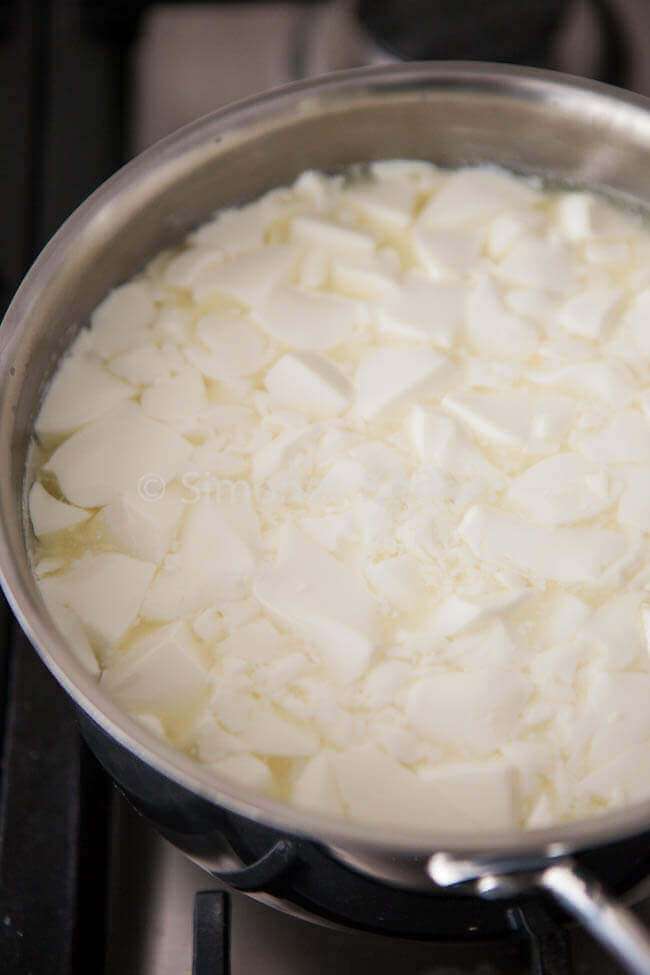
- Cut the curds into squares trying to keep them in the same size as much as possible. This is easy with a sharp knife.
- Rest for 5 minutes, then using a waterbath keep the pan to 35˚C-38˚C and stir gently with your hand or a spoon. You can do this on the stove but I found it easier to control the temperature through a waterbath.
- The squares should look smooth and lightly elastic.
- Carefully drain the contents of the pan into a colander lined with cheesecloth and let it drain until the majority of the whey is gone. About 30 minutes. Make sure to catch the whey in a pot below the colander. You need it later.
- Put the curds into a cheese mold. I used one of 750 gr content. You can use two smaller ones too if you prefer. Line the mould with cheesecloth put the curds in and cover with the cheesecloth. Put a chopping board on top and weigh it down with a pan filled with water.
- Let it sit for at least an hour (probably two) and maybe even longer, until the cheese that comes out is quite firm.
- Now cut the Halloumi cheese into thick slices of about 1-2 centimeter each.
- Reheat the whey to 85˚C-90˚C, then turn the heat off and add the halloumi pieces to the whey.
- Cook for about 20 minutes, stirring from time to time. The cheese will rise to the surface. Mine didn't as it was probably not dense enough.
- Take the cheese slices out, add a pinch of salt on each side and let them dry for a bit on a cooling rack.
- Make a brine with 50% leftover whey, 50% boiling water and 10% salt and put the halloumi pieces in.
- The halloumi will keep up to two weeks in the brine, in the fridge.
Disclaimer
The nutritional values above are calculated per portion. The details are based on standard nutritional tables and do not constitute a professional nutritional advice.
I think that the main reason your Halloumi turned out similar to feta is because your curd got a little too broken up. The cut curd pieces should be at their best the size of hazelnuts. It allows the way to drain and the final cheese to remain soft and smooth.
Hi, I’m a huge cheeseaholic, and I’ve wanted to make my own for a long time, ( my gran made her own and I remember fondly ” helping” ). To make it last longer what is it i need, and at what point in the process do I need to add it ?
He Catherine, You mean adding preservatives? I wouldn’t really know as I never use any.. The cheese never lasts very long here!
please can you tell me what • ‘Saltteuriseerde volle melk. Liefst biologisch’ is?
That’s something that shouldn’t be there.. 🙂 It means organic raw milk, but the translated version was there also. I removed it now. Thanks Dale
How much haloumi does this process make?