Making your own doughnuts!

I made these yeasted doughnuts in 2010 for a Daring Bakers challenge and boy they were soo good I wanted to make sure I transferred the recipe here… Try them. You’ll love them!
The October 2010 Daring Bakers challenge was hosted by Lori of Butter Me Up. Lori chose to challenge DBers to make doughnuts. She used several sources for her recipes including Alton Brown, Nancy Silverton, Kate Neumann and Epicurious.
I made the challenge on a saturday afternoon. Tom had something to do during the day so I got the house (and the kitchen) all to myself to have some fun. Lori gave us four different recipes, but ultimately the only thing we had to do was to make doughnuts. The rest would be entirely up to us. Now I have been tempted before to make doughnuts after visiting the wonderful blog of Lara Ferroni, who recently also published a book about doughnuts (which I purchased now that I know how delicious homemade doughnuts are!!) so the first thing I did after reading about the challenge was to go to Lara’s site and check what tips and or recipes she had to share. I saw a delicious looking recipe for baked chocolate doughnuts, so I decided I wanted to go with both the Yeast doughnuts that Lori gave us and the recipe from Lara, which could be made in exactly the time it took to let the dough of the yeast rise. (the baked doughnuts will follow tomorrow!)
Doughnuts are not something that is eaten a lot in the Netherlands; I mean, we do have them in supermarkets and bakeries but I won’t say that it is something that is eaten a lot. We call them donuts by the way, not sure if that is typically Dutch or just another way of spelling it.. 🙂 I’ve had some nice doughnuts before and I’ve always liked the ones with pink glaze on them, which seemed to be the best ones (at least for me) but they tend to be dry and not the most exciting treat you can give yourself. So I was very curious to find out how homemade doughnuts would taste. I started out by preparing the dough for the yeast doughnuts and followed the recipe, with the exception of the fact that I added some cinnamon into the batter as I love cinnamon and thought would it work well with the final lemon glaze I had in mind. Now according to the recipe the dough, while in the standmixer, should come away from the sides of the bowl. Lori said it took only 2 minutes for her, but I had left it turning for quite a while longer and well, it came of the sides a little bit, but maybe I should have waited a while longer still. With doughs and batters I am always a bit careful and afraid that I might actually overbeat the batter, so I figured it would have to do and transferred it to a greased bowl, to rise for an hour.
As you can see from the photo; it looks very soft… too soft I think.
While the dough was nicely tucked away and rising, I prepared the batter for the chocolate doughnuts, which was incredibly simple and easy to do. The recipe called for using either a doughnut tin or use a muffin tin. I don’t have a doughnut pan, so I used the muffin tin and piped the batter in neat little rings in the tin.
The baking is really quick and takes about 6-10 minutes depending on the size and depending on your oven. Mine took just about 8 minutes to be done. If you put your finger in the dough it should spring back and not leave a dent, so you know they are ready. During the baking process the dough was rising so much that the entire hole in the middle disappeared, so I cut out of a few holes in some of them just to make them look like doughnuts again and once glazed and sprinkled with chocolate, you don’t even see it anymore.. 🙂
Once those were done I moved onto the yeast doughnuts. The dough had risen a lot, so nothing wrong with that part, it was just way too soft and quite sticky so that was definitely not how it should be, as far as I can tell. But, ok, I decided to go with it and managed to sort of pat it into the right thickness. Rolling was impossible with the consistency it was. Too sticky and soft!
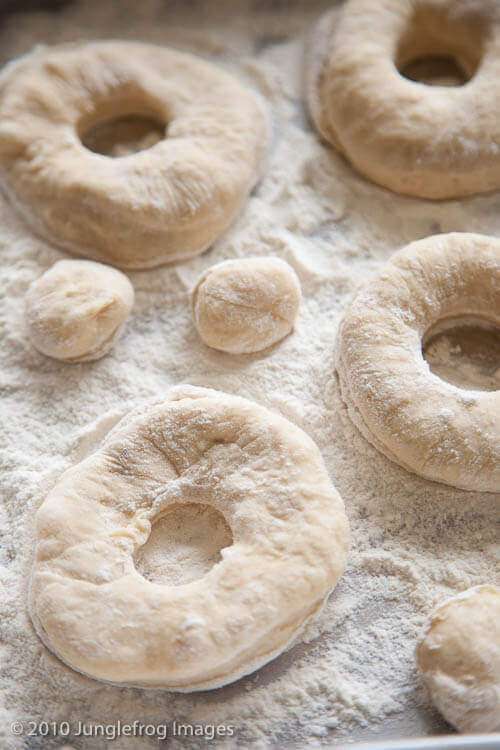
Putting them from the counter to a separate sheet where they could rise again proved difficult enough, so the shape didn’t really stay together very well, but the more flour I added the firmer they seemed to become, which let me to believe that the amount of flour I used might have been wrong somehow. In either way, as you can see from the photo the shape is not perfect by any means, but it sort of resembles a doughnut right?
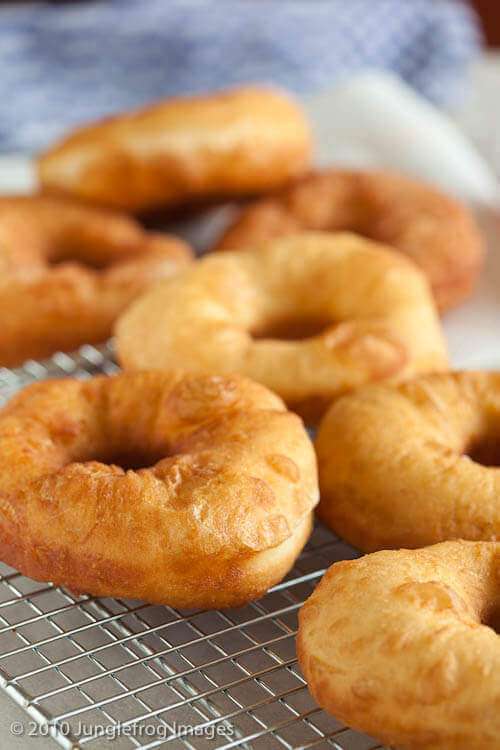
I let these rise for another half hour and then heated the oil to the right temperature. Obviously since I had to fry them that meant I had to pick these limp doughnuts up again and transfer them into the oil. Needless to say that that proved a little tricky, but once they were frying they firmed up immediately and started to look much better. Still with odd shapes here and there, but to be honest; I figured they would still taste good regardless of their looks!
The second batch actually held their shape together better, which again was due to the larger amount of flour that I used for ‘rolling’ out the dough so they were a little firmer and easier to bake too.
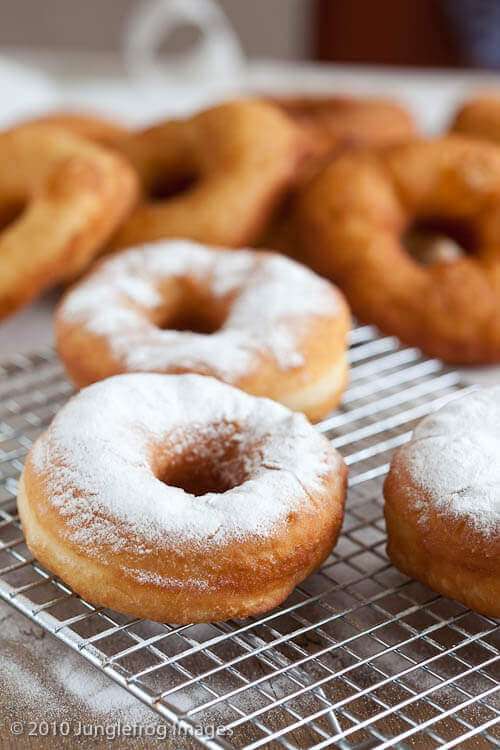
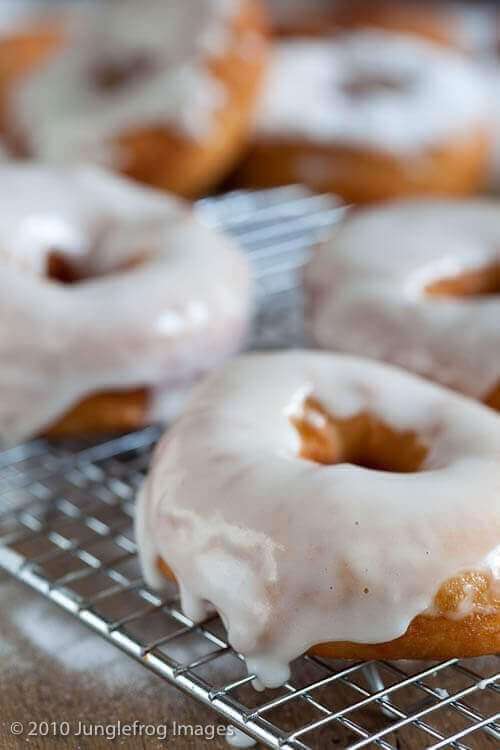
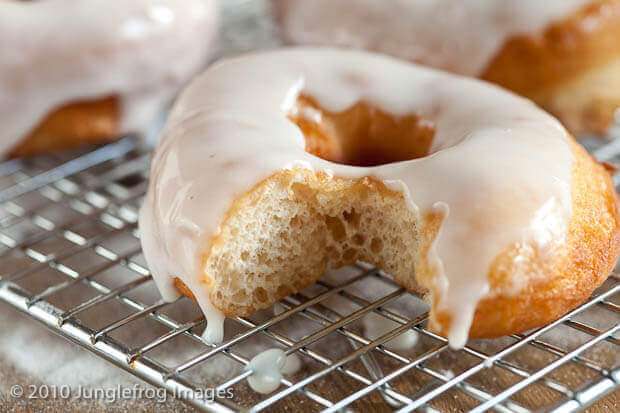
I kept the glaze simple; I made a lemon glaze, which I always love and dipped them in. I think the glaze could have been a little thinner then it was, but the biggest problem was that the size of the doughnuts was too big for my bowl..lol… So I ended up smearing the glaze on. It still looks the same as it smooths out quite well.
So after all that work, I was entitled to a taste of my homemade doughnuts and o my god, they are SOOOO good!!
I had actually not expected them to be so good! It a difference of day and night, between these ones and the ones that I had before (never a homemade one!) they are wonderfully airy, the crust is lovely and crisp and the cinnamon in the batter for me came out quite nicely and combined with the lemon glaze it was a winning combination. So I will definitely be making these again but possibly with better dough, as it made it quite hard to handle them. Also on the list of things to get it a doughnut cutter. I mean; it works fine with two separate cutters, but still… something to want for christmas! 🙂
Thanks Lori for this wonderful challenge!! I loved it!
Homemade doughnuts with lemon glaze

Ingredients
- 1,5 cup 360 ml Milk
- 70 gr or 1/3 cup butter you can use vegetable shortening, margarine or lard
- 14 grams active dry yeast usually two packages
- 80 ml or 1/3 cup warm water 35 to 41 C
- 2 large eggs beaten
- 55 gr 1/4 cup sugar
- 1.5 tsp or 9 gr of table salt
- 1 tsp grated nutmeg 6 gm
- 1 tsp cinnamon 6 gm
- 650 gr all purpose flour 4 2/3 cup + extra for dusting
- Canola oil. You need enough to have at least 3 inches of oil in your pan.
- Place the milk in a medium saucepan and heat over medium heat just until warm enough to melt the shortening. (Make sure the shortening is melted so that it incorporates well into the batter.)
- Place the shortening in a bowl and pour warmed milk over. Set aside.
- In a small bowl, sprinkle the yeast over the warm water and let dissolve for 5 minutes. It should get foamy. After 5 minutes, pour the yeast mixture into the large bowl of a stand mixer and add the milk and shortening mixture, first making sure the milk and shortening mixture has cooled to lukewarm.
- Add the eggs, sugar, salt, nutmeg, and half of the flour. Using the paddle attachment of your mixer (if you have one), combine the ingredients on low speed until flour is incorporated and then turn the speed up to medium and beat until well combined.
- Add the remaining flour, combining on low speed at first, and then increase the speed to medium and beat well.
- Change to the dough hook attachment of the mixer and beat on medium speed until the dough pulls away from the bowl and becomes smooth, approximately 3 to 4 minutes (for me this only took about two minutes). If you do not have a dough hook/stand mixer – knead until the dough is smooth and not sticky.
- Transfer to a well-oiled bowl, cover, and let rise for 1 hour or until doubled in size.
- On a well-floured surface, roll out dough to 3/8-inch (9 mm)thick. (Make sure the surface really is well-floured otherwise your doughnuts will stick to the counter).
- Cut out dough using a 2 1/2-inch (65 mm) doughnut cutter or pastry ring or drinking glass and using a 7/8-inch (22 mm) ring for the center whole. Set on floured baking sheet, cover lightly with a tea towel, and let rise for 30 minutes.
- Preheat the oil in a deep fryer or Dutch oven to 365 °F/185°C.
- Gently place the doughnuts into the oil, 3 to 4 at a time. Cook for 1 minute per side or until golden brown (my doughnuts only took about 30 seconds on each side at this temperature).
- Transfer to a cooling rack placed in baking pan. Allow to cool for 15 to 20 minutes prior to glazing, if desired.
Disclaimer
The nutritional values above are calculated per portion. The details are based on standard nutritional tables and do not constitute a professional nutritional advice.
I need to stop coming by when I am already hungry. I’m going to make these this weekend because they look so delicious. And we Americans LOVE donuts!! 😉
Lol… Sorry for tempting you Bri! But yes these are awesome….
Doughnuts are seriously good things. We make the baked kind often, rarely the fried ones. But the fried ones are so much better! Gotta do them again. And I love lemon, so that’ll be the glaze!
Yrs I gotta confess that the baked ones where good, but the fried ones ten times better! I’m actually salivating right now thinking about them…. 🙂
I love reading about yeasted doughnuts, maybe it is time to make some. They look so light and delicious! Yum, Hugs, Terra