Artisan bread in 5 minutes; Monthly Mingle yeasted dough

Artisan bread in 5 minutes a day would that really be a possibility? When we had the breadbaking course last monday, my friend Tineke had brought the book Artisan Bread in 5 minutes a day along to discuss with our workshop leaders. Edwin Klaasen is a baker and obviously the workshop was held in a bakery so there was some interest as to the concept of the no-knead method. They copied the master recipe out of the book and I am not sure if they were gonna try it out or if they would have use to a trial next week, but in any case; I didn’t want to wait.
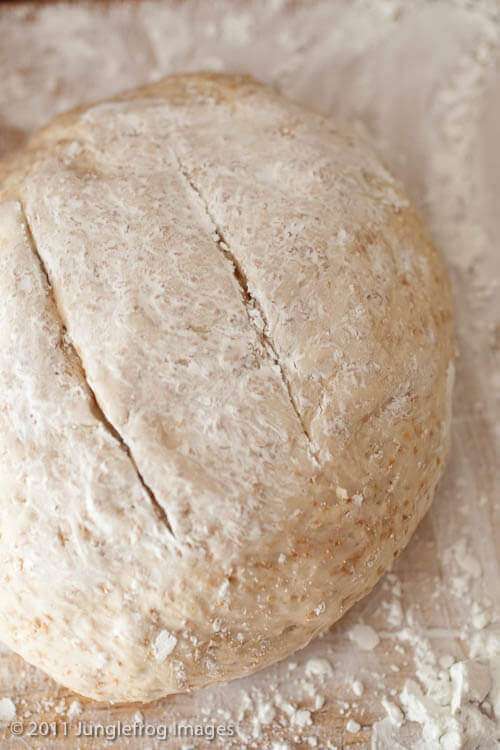
The dough looks a little too dry before going in the oven as you can see
It was also tweeted by the #coldcoffeeclub that the Monthly Mingle for this month would be all about yeasted dough, so that seemed like the perfect opportunity for me to give it a try. It has been far too long that I participated in the Monthly Mingly of my dear friend Meeta from the fabulous blog What’s for Lunch Honey
I’ve had the book for quite a while; I think I bought it months ago together with another breadbaking book so after studying the recipe carefully I decided to give it a go yesterday. In theory it all sounds absolutely perfect. You make a batch of dough, don’t do anything other then mix it all together. Let it rest for about 2 hours, pop it in the fridge and ready to go! How easy does that sound?
Now I might have slightly changed the recipe, as I didn’t have all purpose flour anymore (which I was supposed to use) but only whole wheat flour, so I used that instead and did not adjust anything else. I added the water, threw in the yeast, salt and the flour mixed it briefly to remove any dry patches and just let it sit on the kitchen counter for a while. It rose as intended but it didn’t actually flatten on the surface. I waited a couple more hours but it appeared that the dough was not as moist as they said it would be. My guess is that this is mostly part to the whole wheat I used, but not sure. I popped it in the fridge for the afternoon until I was ready to bake it. The book does say that it makes sense to have it refrigerate for at least overnight so the flavors can develop but I wanted to have bread that night so I couldn’t wait so long and technically it should be ok to use straight away.
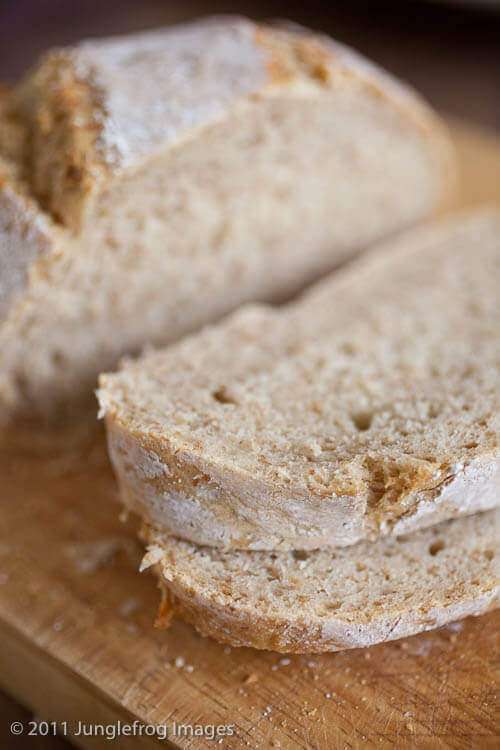
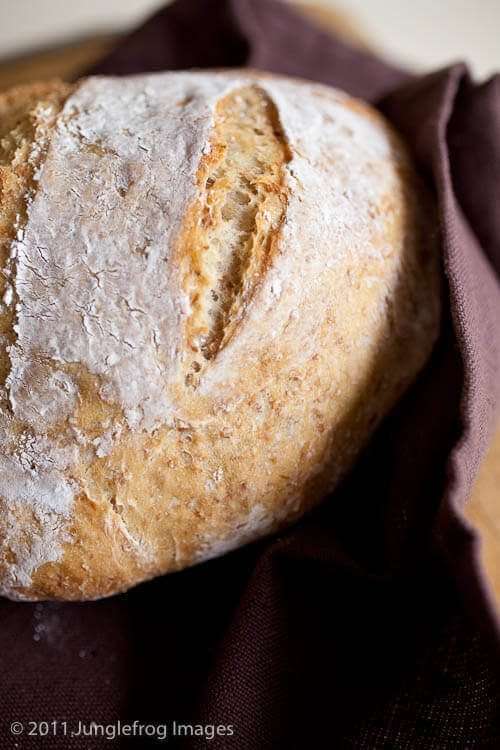
I took it out of the fridge, formed it as instructed, then left it to rest for another 20 minutes before popping in the hot oven. I did use a little too much cornflour on the top as you can see but that didn’t change anything to the flavor as far as I have been able to tell. When I took it out it looked very firm so I was a bit concerned that it would be inedible but once it cooled down a bit you could hear the cracking of the crust when squeezed a tiny bit.. And I was actually not disappointed when I cut my first slice and had it with a bit of Old Amsterdam… Slightly warm bread, lovely old cheese… Mmm, what’s not to like right?

So all in all I think it was a good experiment; I liked the bread more then I had thought I would and it is – especially considering the amount of effort (none) – good. It’s not the worlds best bread but then I did do a couple of things wrong so I will make it again and then follow proper instructions to see how it will turn out. Ofcourse I am going to be baking with my sourdough soon so I am more excited on how that will turn out, but in the meantime this was not bad at all!
Artisan bread in five minutes

Ingredients
- 3 cups luke warm water
- 1,5 tbsp granulated yeast 2 packets
- 1,5 tbsp kosher or other coarse salt
- 6,5 cups unsifted unbleached, all purpuse white flour
- cornmeal for pizza peel
- Warm the water slightly; just a little warmer then body temperature. Warm water will rise the dough to the right point for storage in about 2 hours, You can use cold tap water and get an identical final result but it will take longer.
- Add yeast and salt to the water in a large bowl or a resealable (not airtight) container. It's not important to dissolve all the yeast.
- Mix in the flour with a spoon or with a standmixer. Make sure the dry patches are all incorporated but kneading is not necessary.
- Leave to rise for about 2 hours or until it starts to collapse or flattens on top.
- Store the dough in the fridge until ready to use.
- When ready to bake cut a grapefuit size piece of dough from your supply. Sprinkle a bit of flour on your dough and your hands so it doesn't stick. Make a ball of your dough and leave to rest for an additional 20 minutes while you preheat the oven and a pizzastone in the meantime.
- Also prepare a waterbath by putting an empty broiler tray in the bottom shelf of the oven. Preheat the oven to 240 C. (450F)
- Dust the dough with flour before slashing it with a knife to create a pattern on top.
- Slide the loaf into the oven and add boiling water into the tray in the bottom.
- Bake for about 30 minutes or until the crust is nicely browned and firm to the touch.
- Remove from the oven and leave to cool on a wire rack.
Disclaimer
The nutritional values above are calculated per portion. The details are based on standard nutritional tables and do not constitute a professional nutritional advice.
 I am sending this bread in for the Monthly Mingle!